Before you begin, you will need an Authory Professional account, a Notion account, and a Zapier account.
Setting up the Notion Database
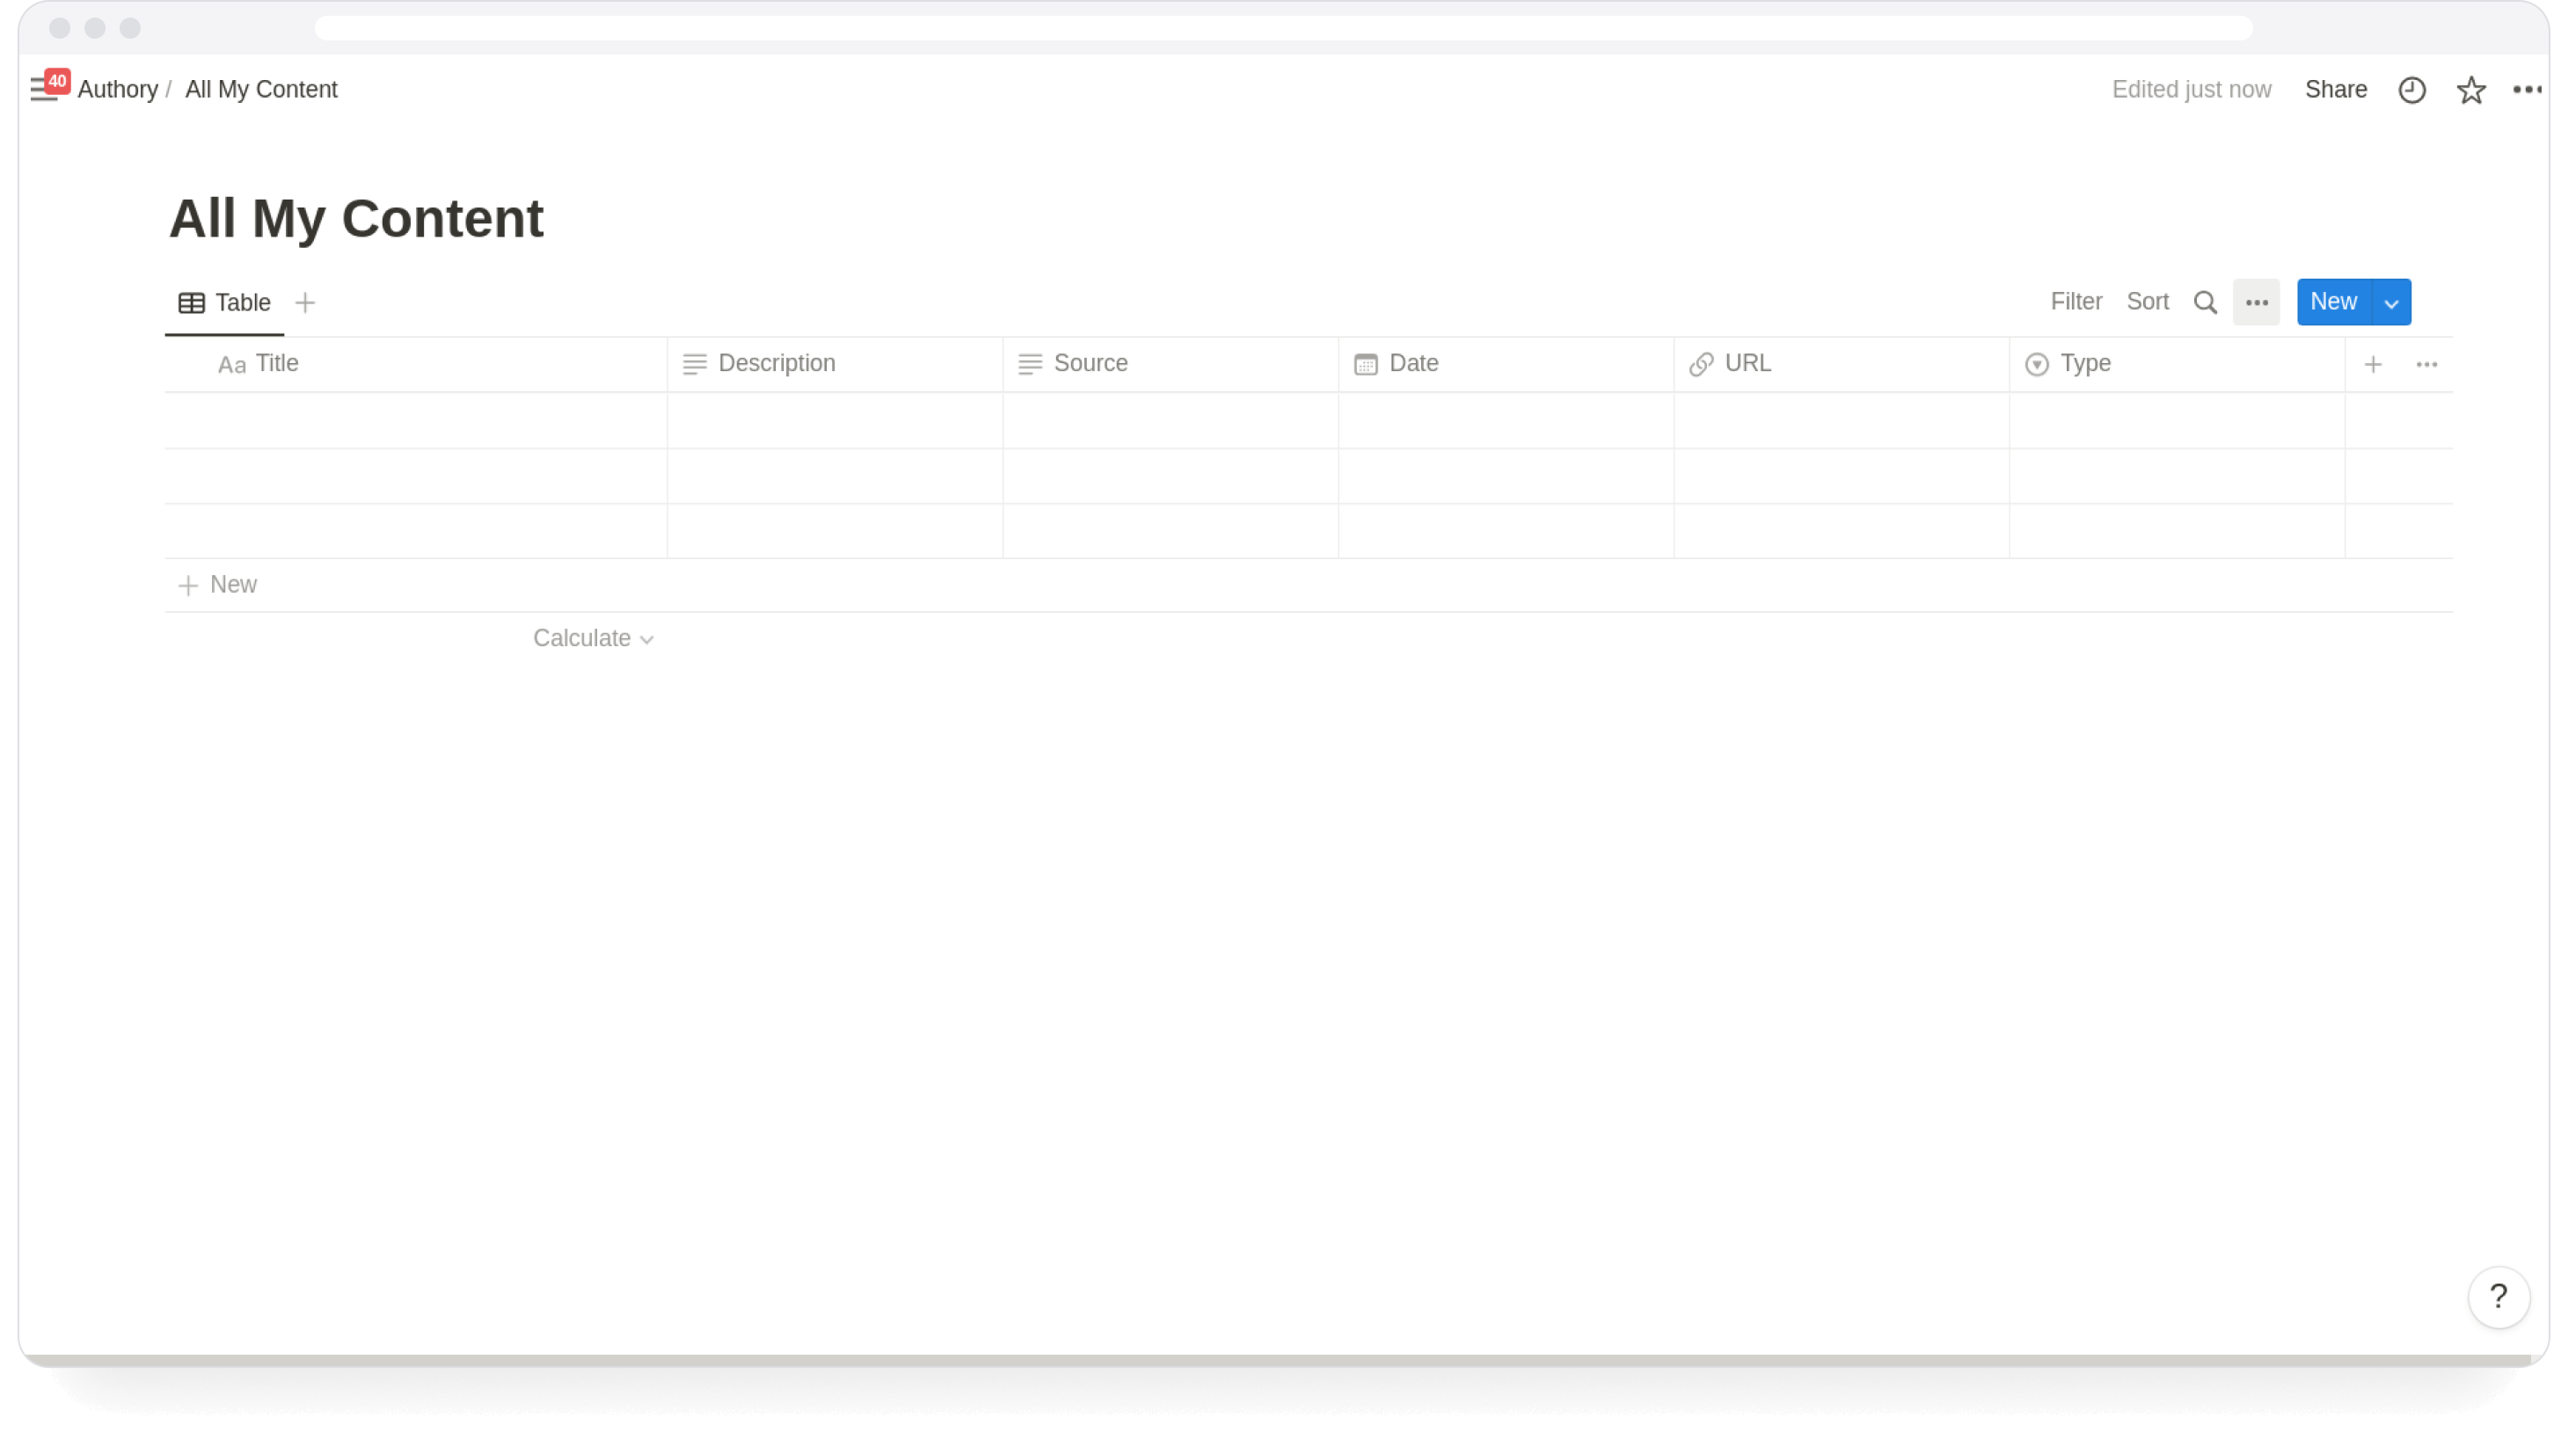
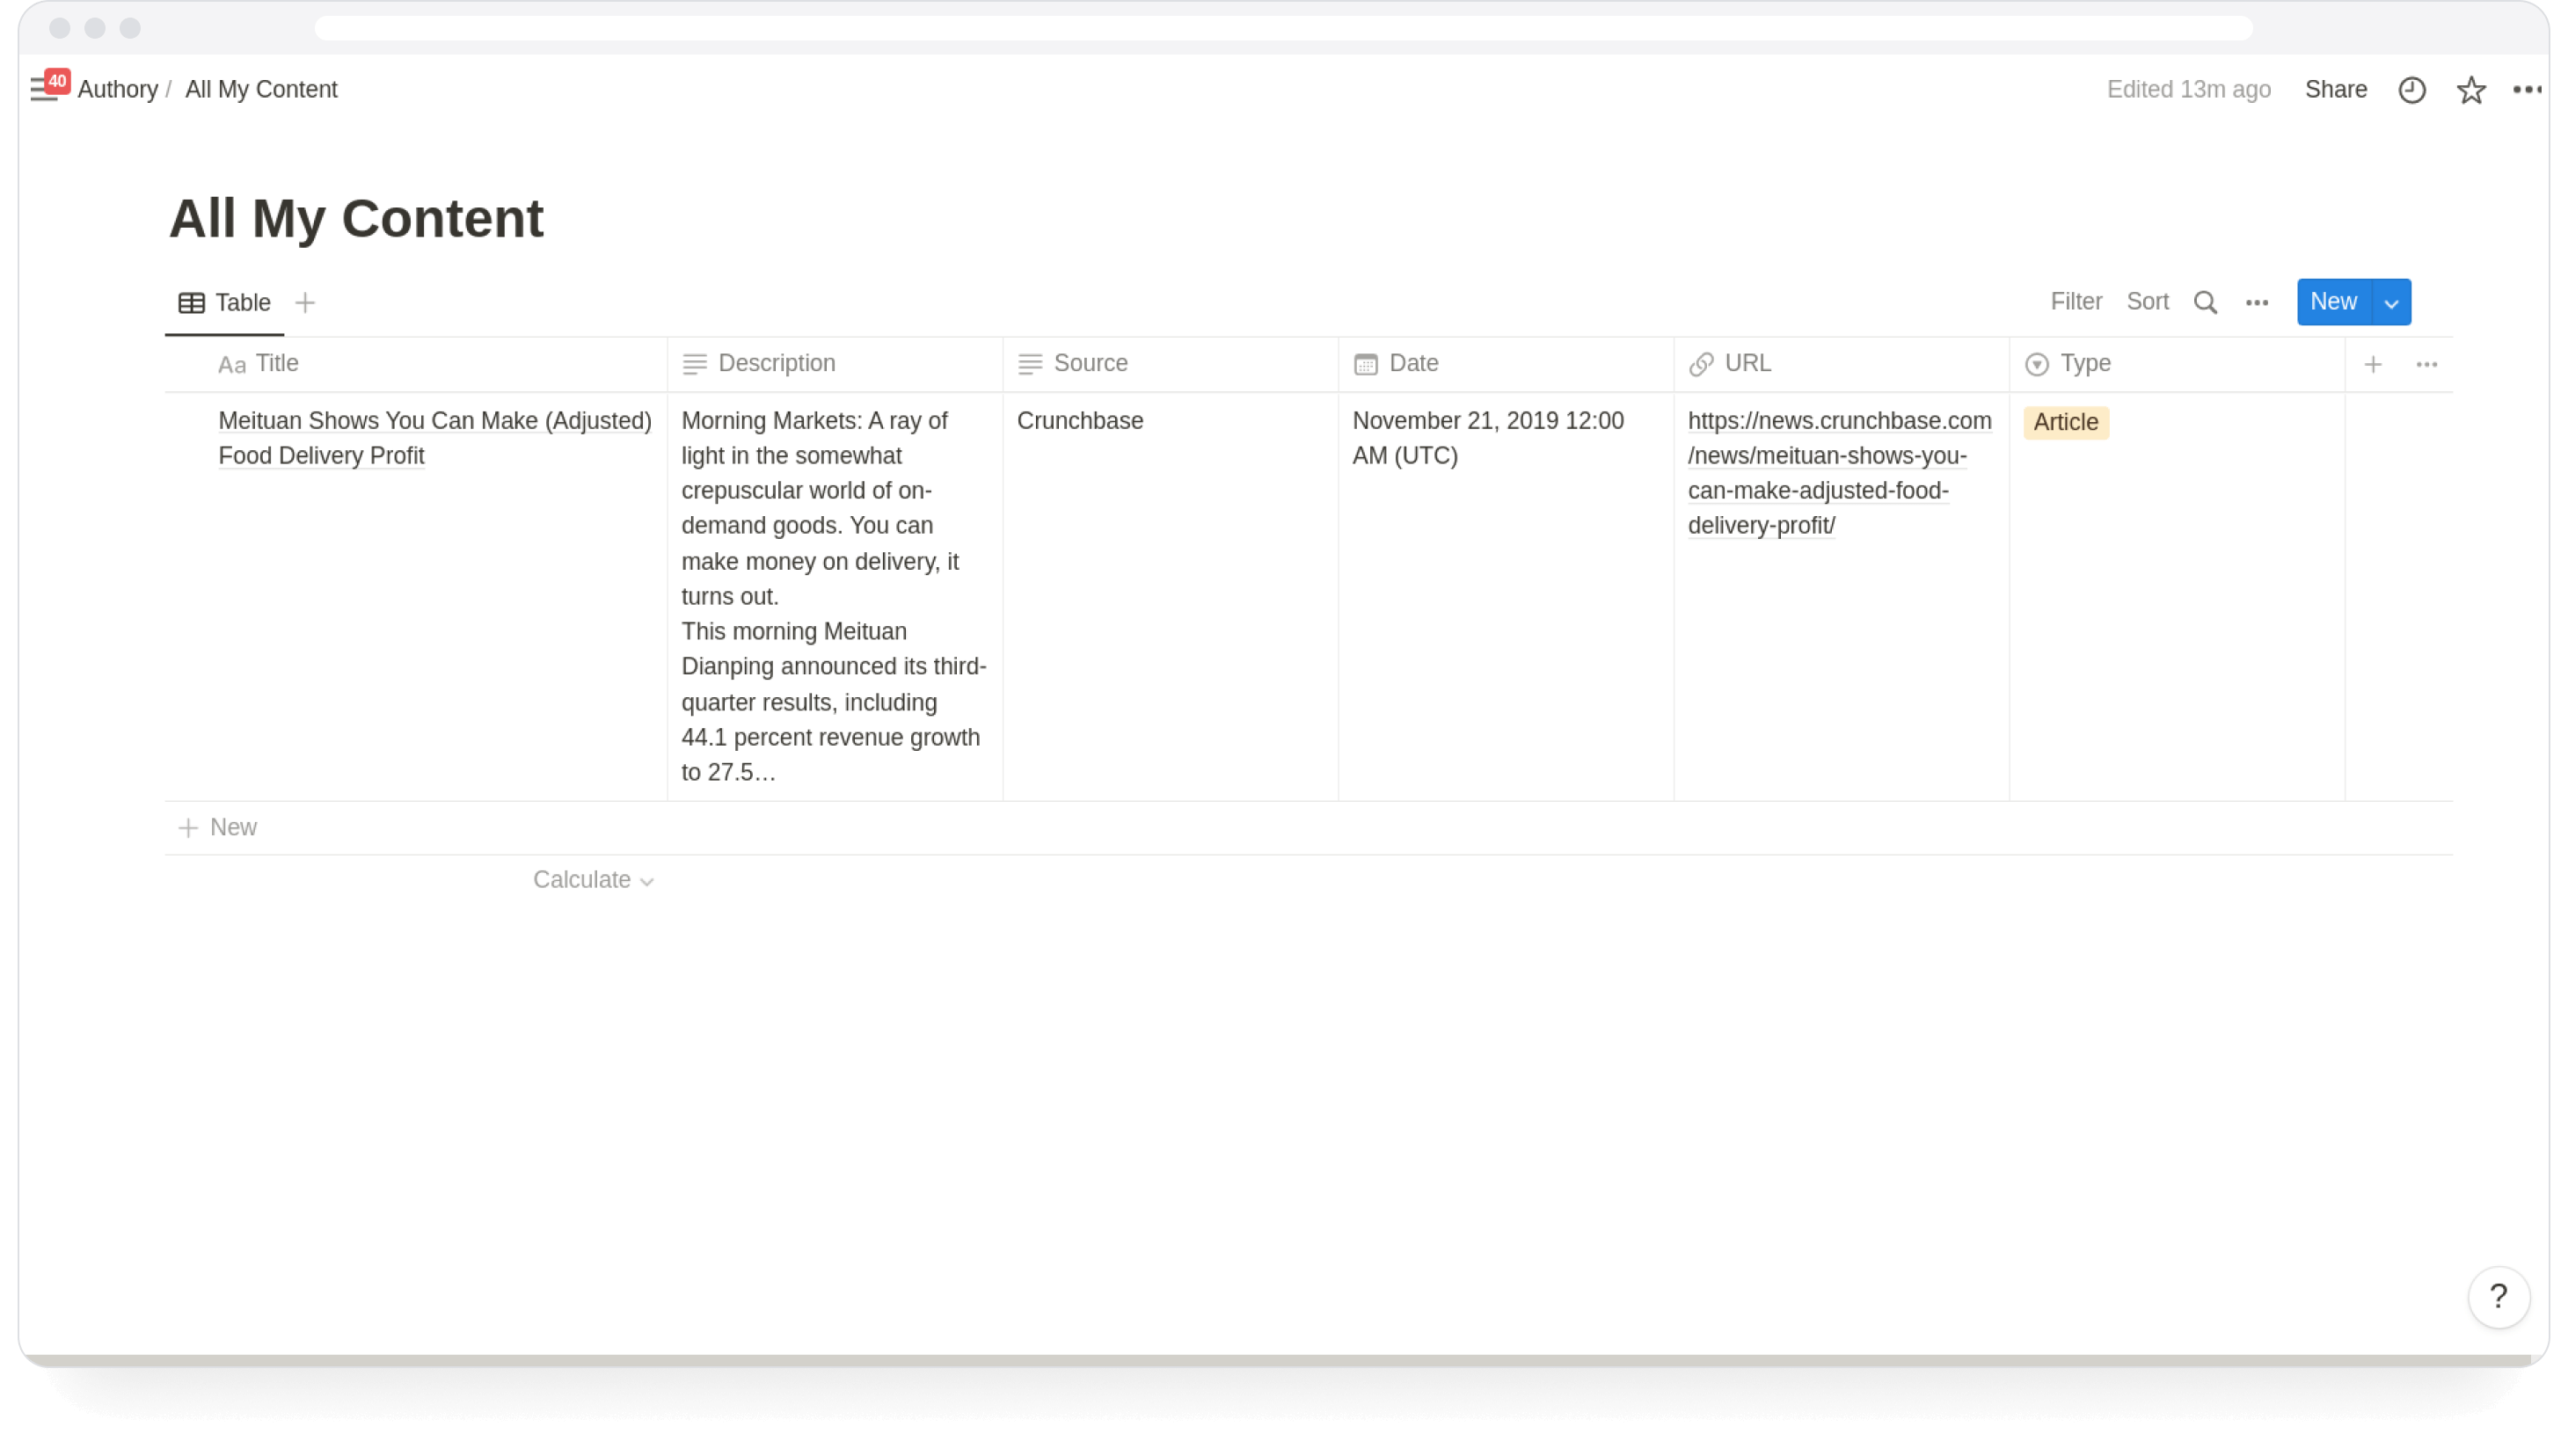
Log into your Notion account and create a new page or select an existing database to use.
You can add any field you'd like. For this tutorial, we will add the following fields to the database:
- Title (Text)
- Description (Text)
- Source (Text)
- Date (Date)
- URL (URL)
- Type (Select)
Setting up a Collection in Authory
If you only want specific pieces to be added to Notion, you can configure a collection that contains all the content you want to add in the future. Learn more about setting up Collections.
We will later configure our Zap to only trigger when new content is added to this collection.
For example, the following rules would only trigger the Zap for Articles from TechCrunch.
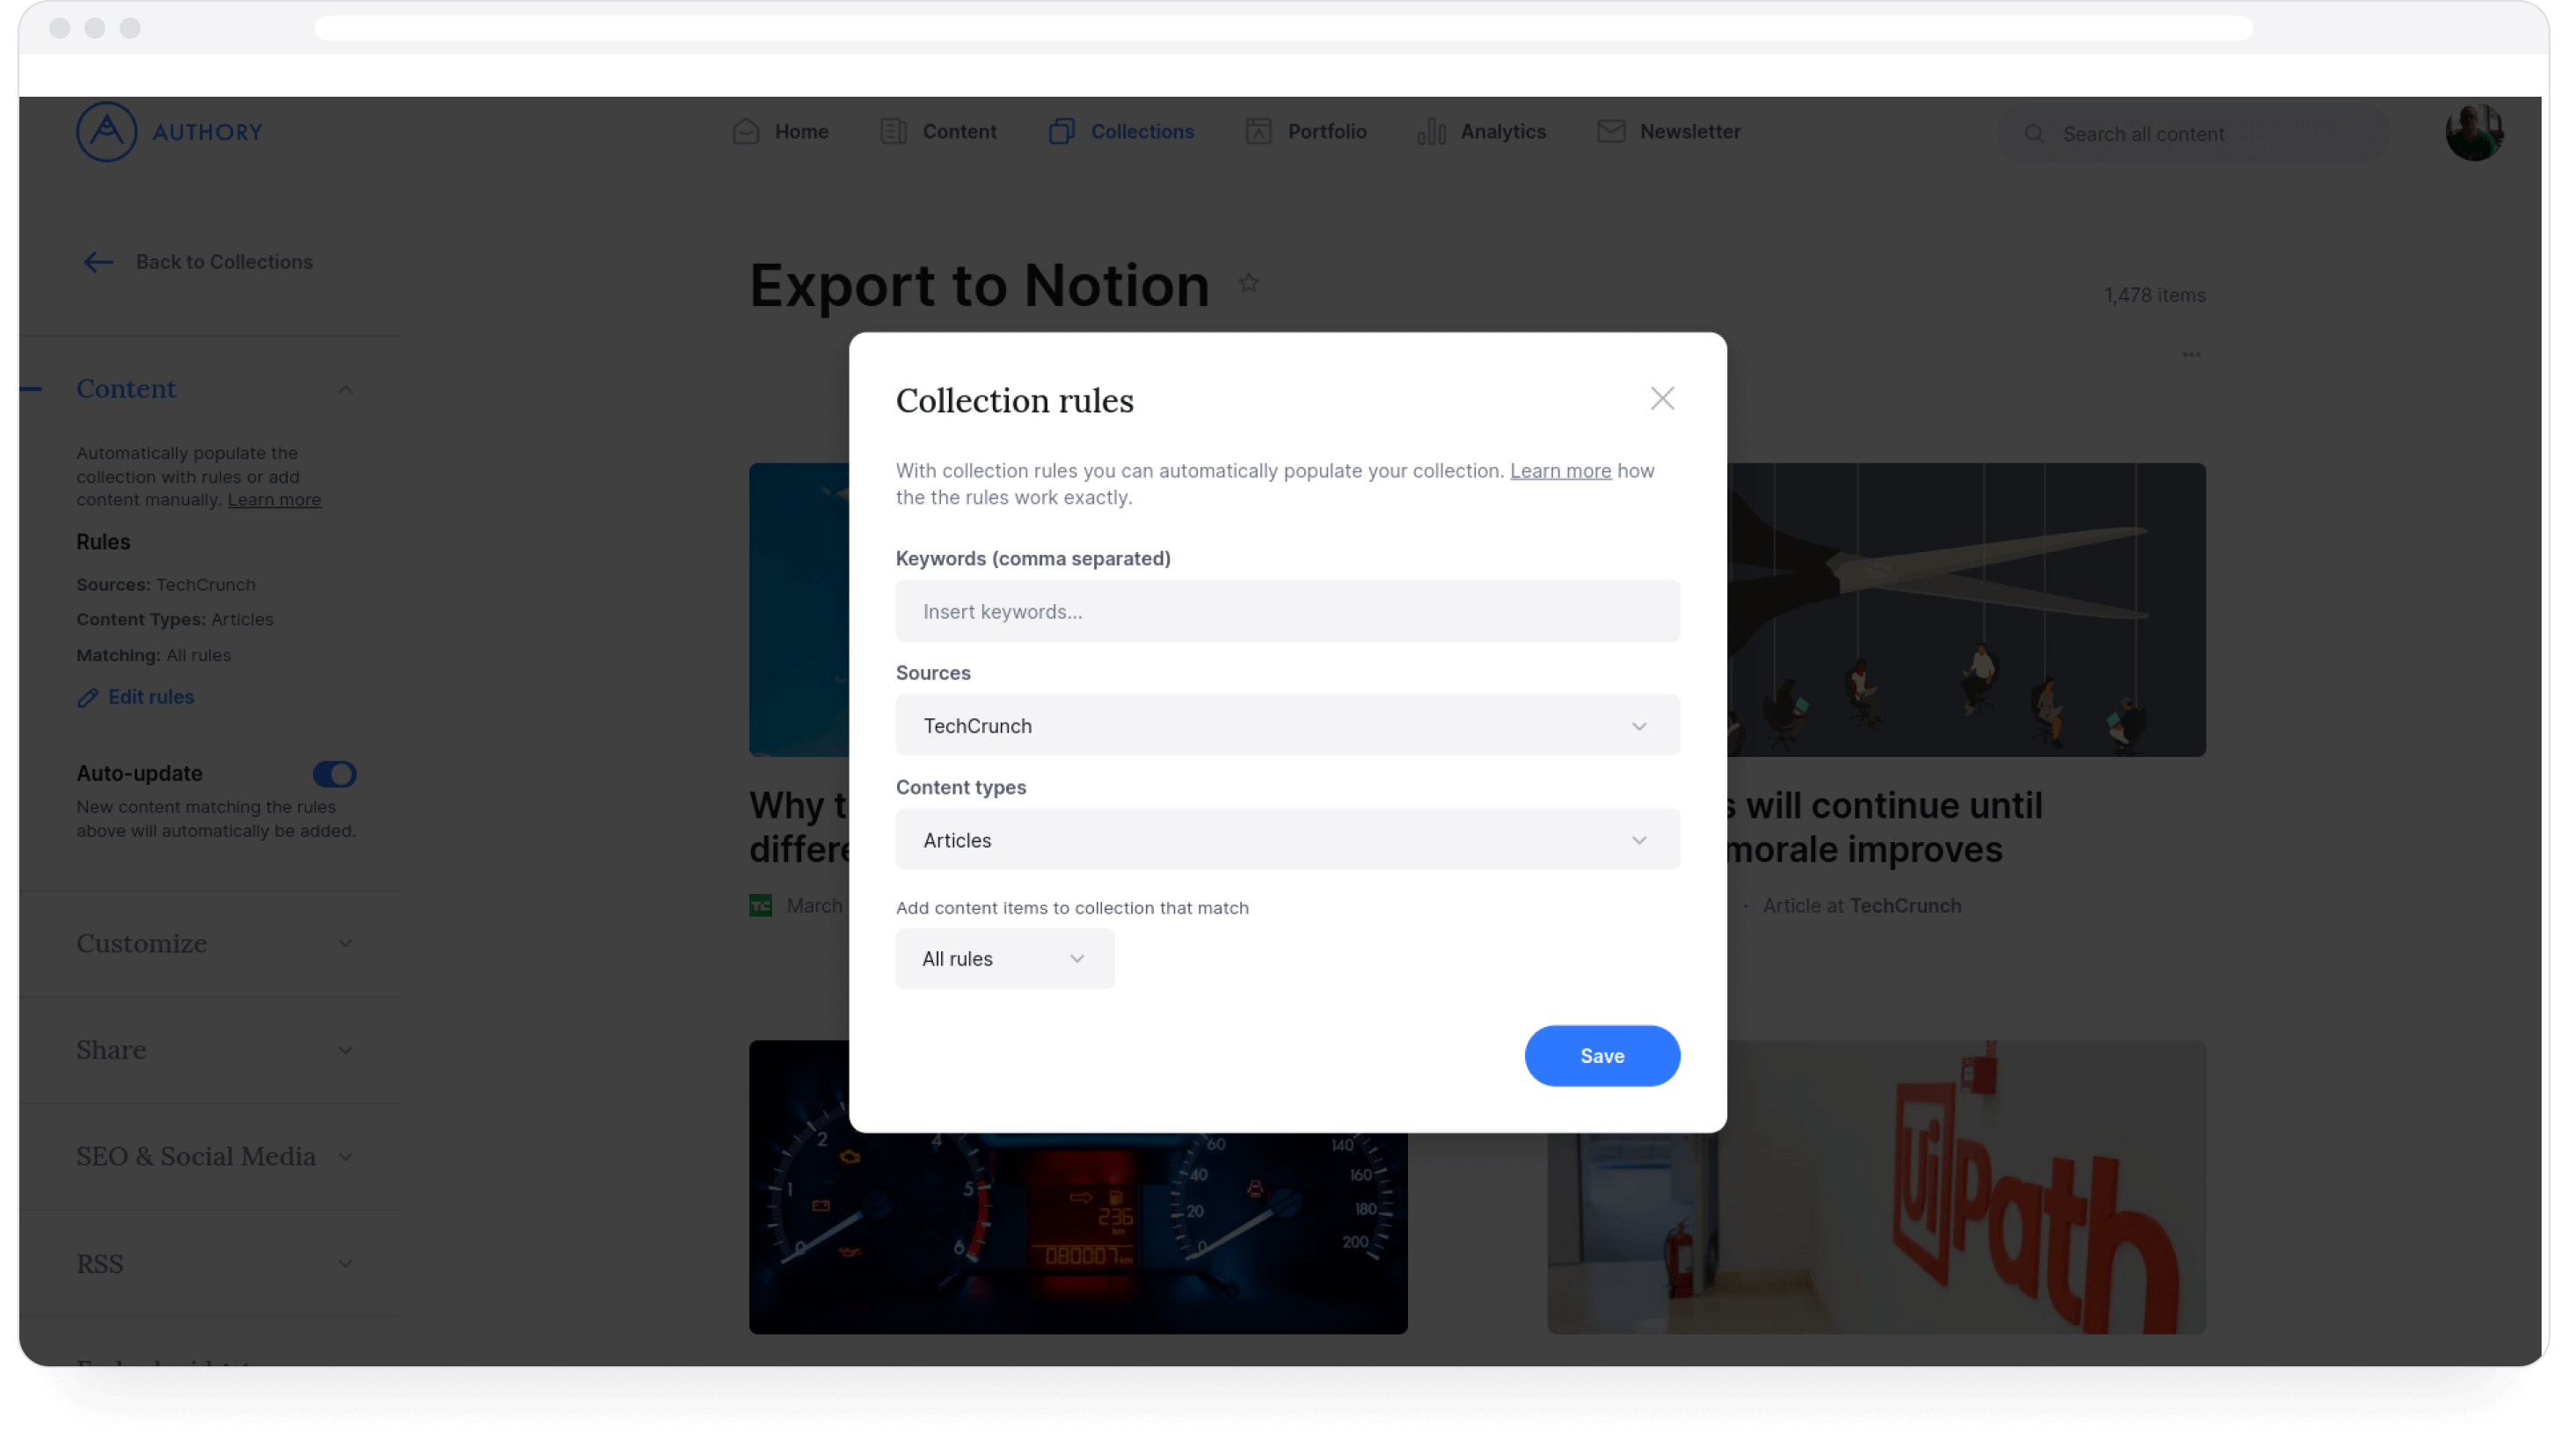
Make a note of the collection ID. You can find the collection ID at the end of the URL shown in the browser when viewing the collection settings.

Alternatively, the Authory integration also supports triggering for any content added to your archive, regardless of the collection.
Connecting Authory with Zapier
Once you have a Notion database set up, you can create a new Zap in Zapier to connect Authory with Notion.
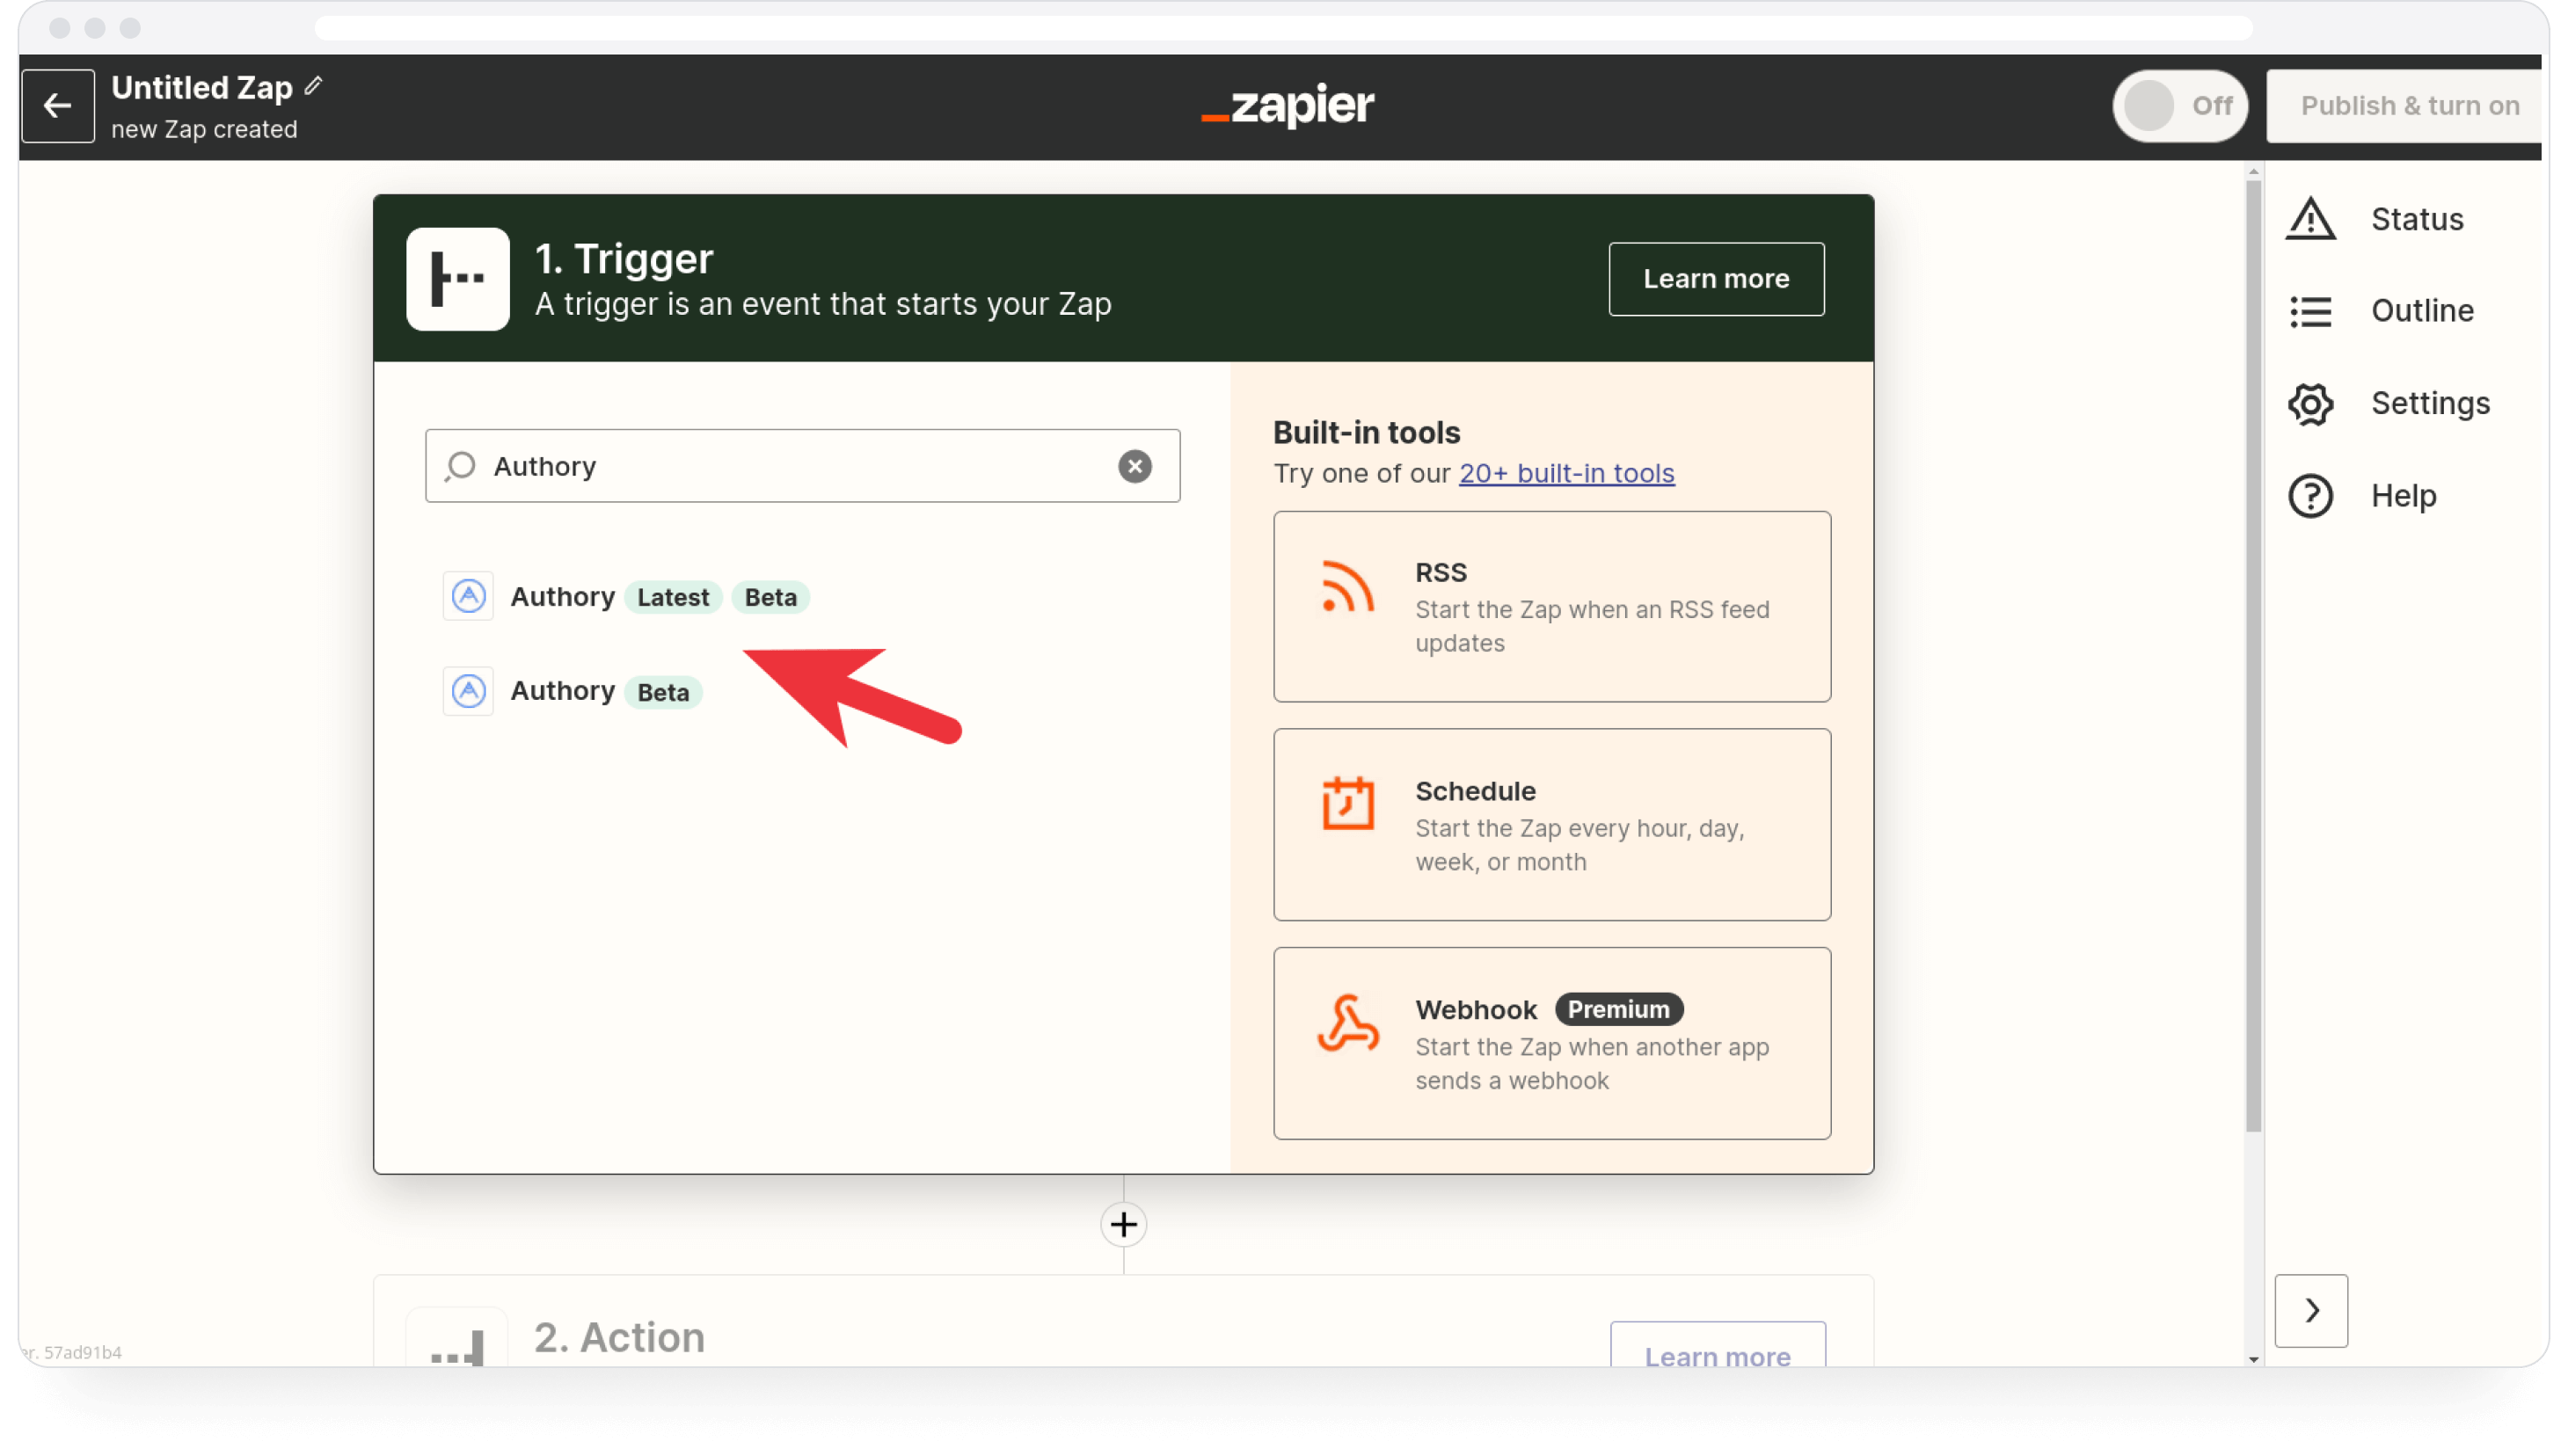
Create a new Zap and select Authory as Trigger.
On the next screen, select New Content Added to Collection as event. This means the Trigger will fire whenever a new content item is added to the collection we will select next.
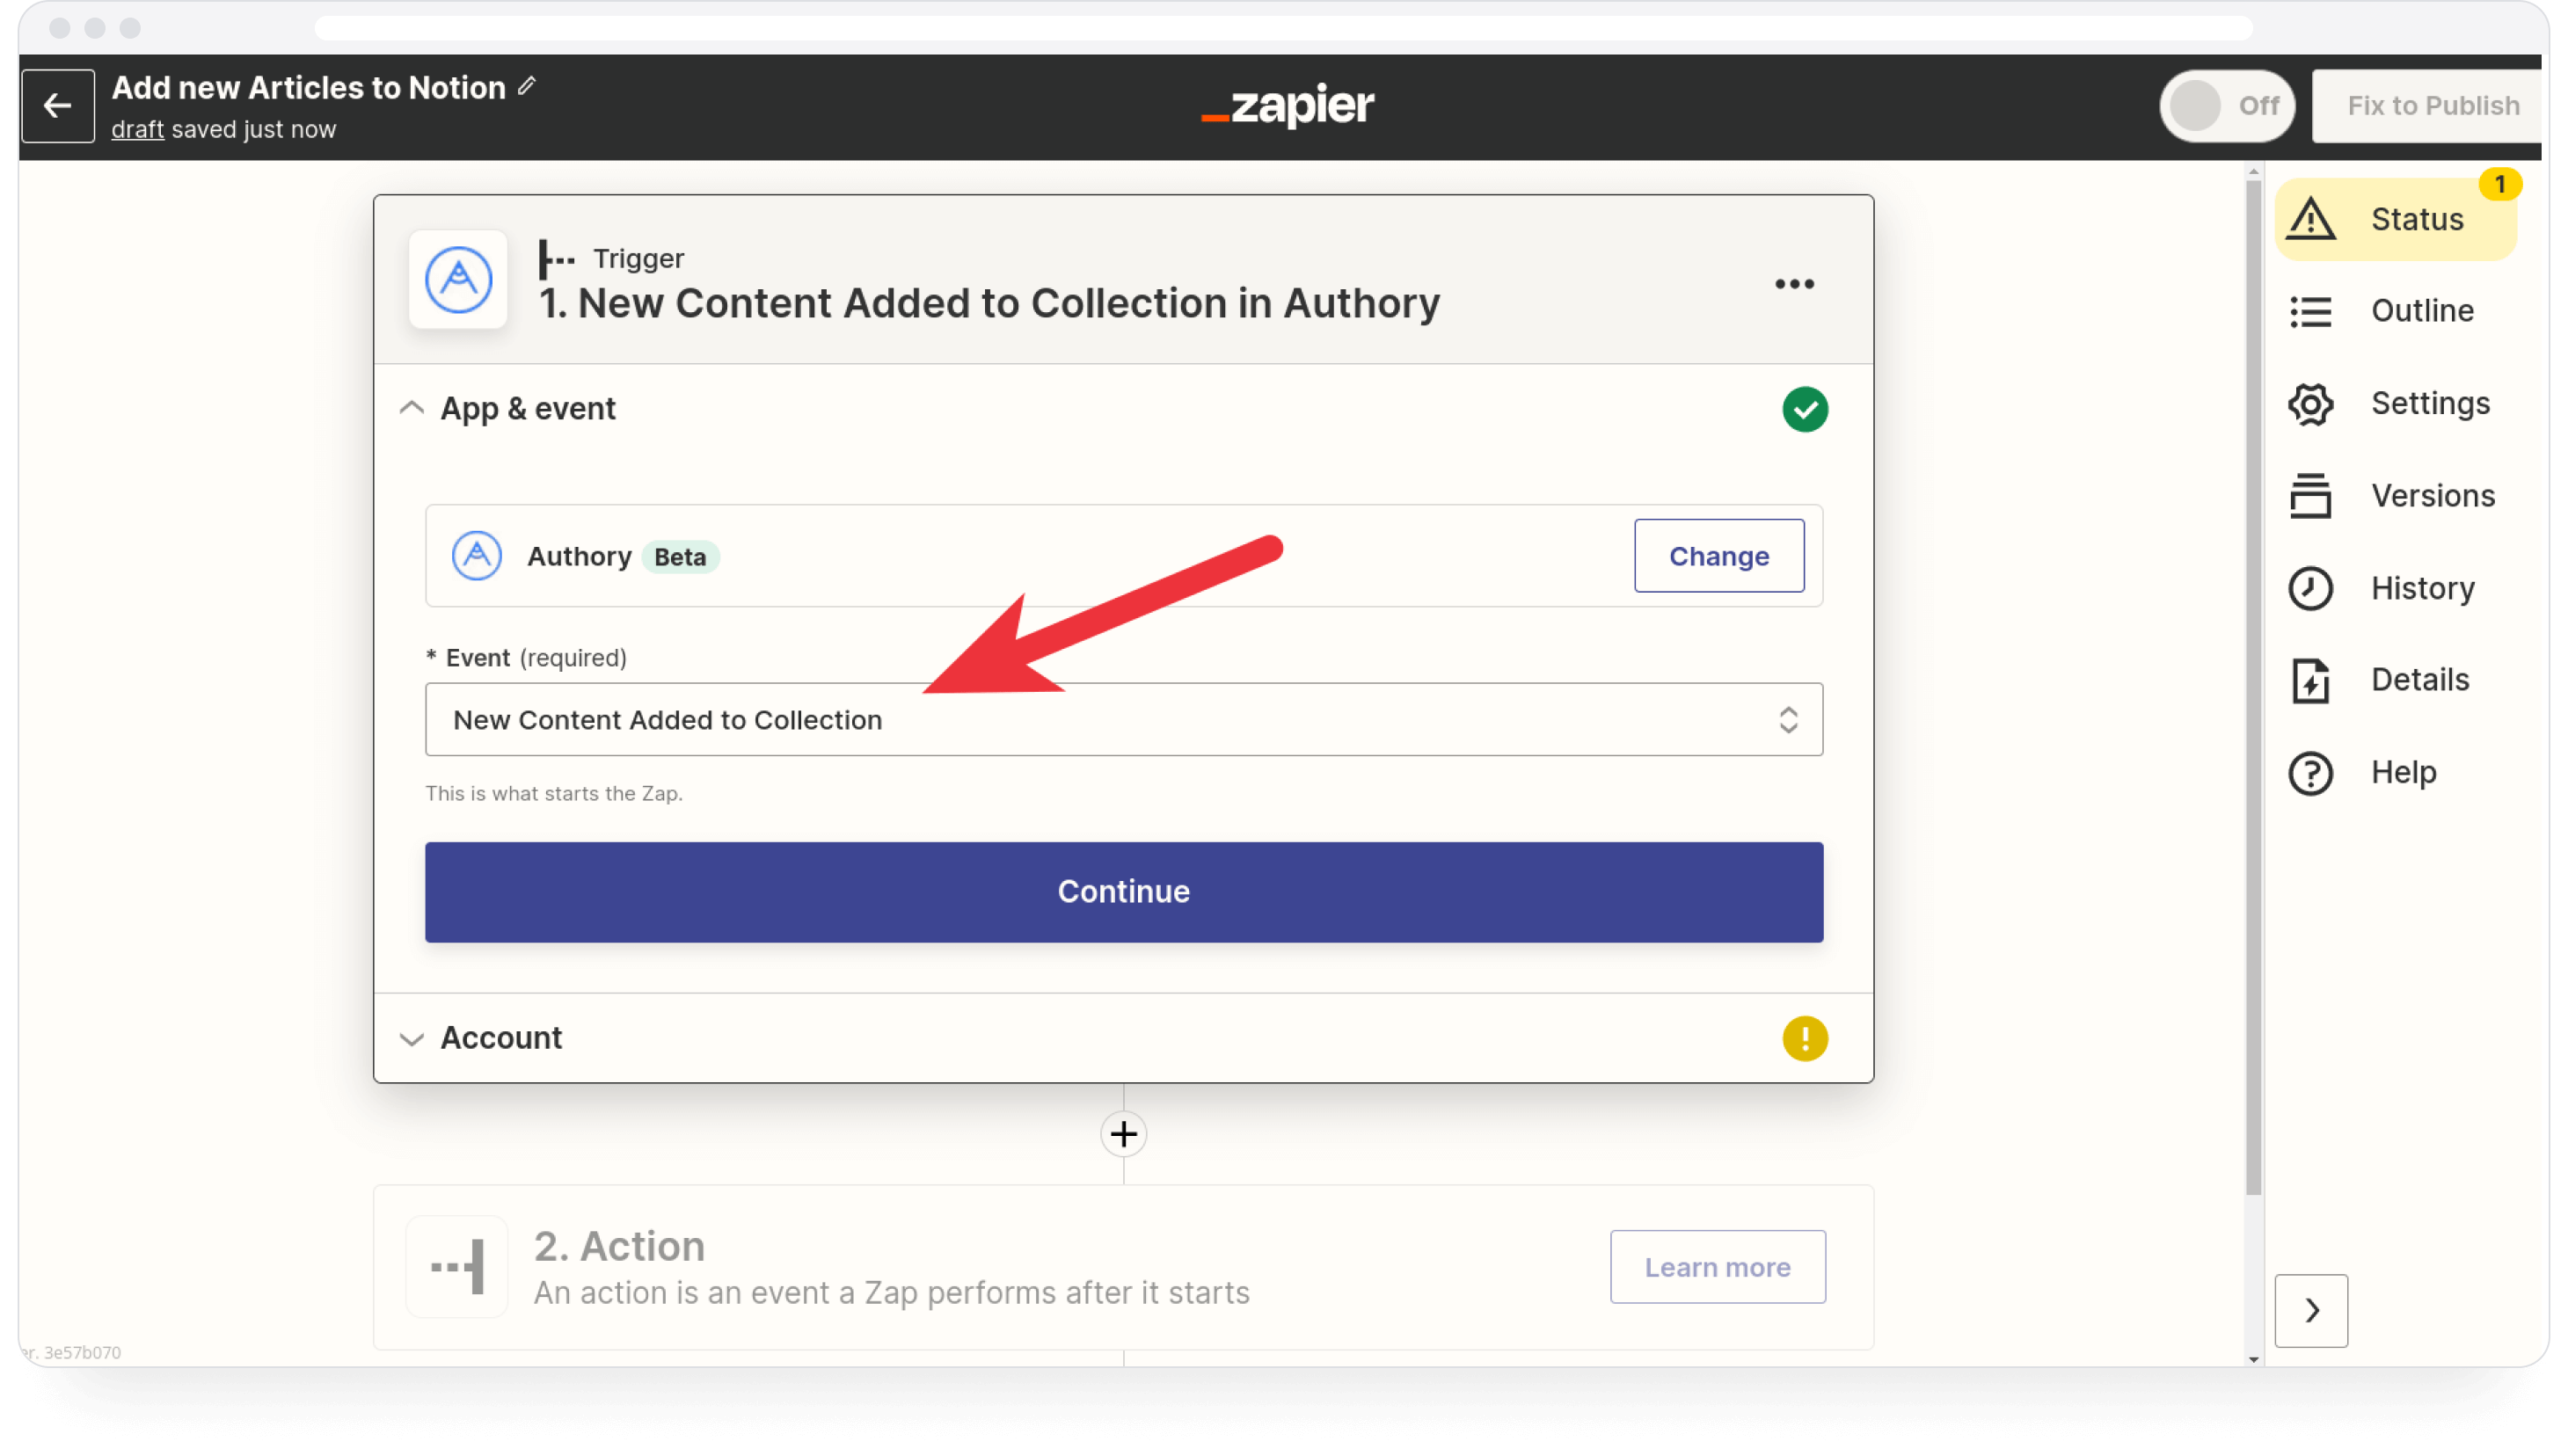
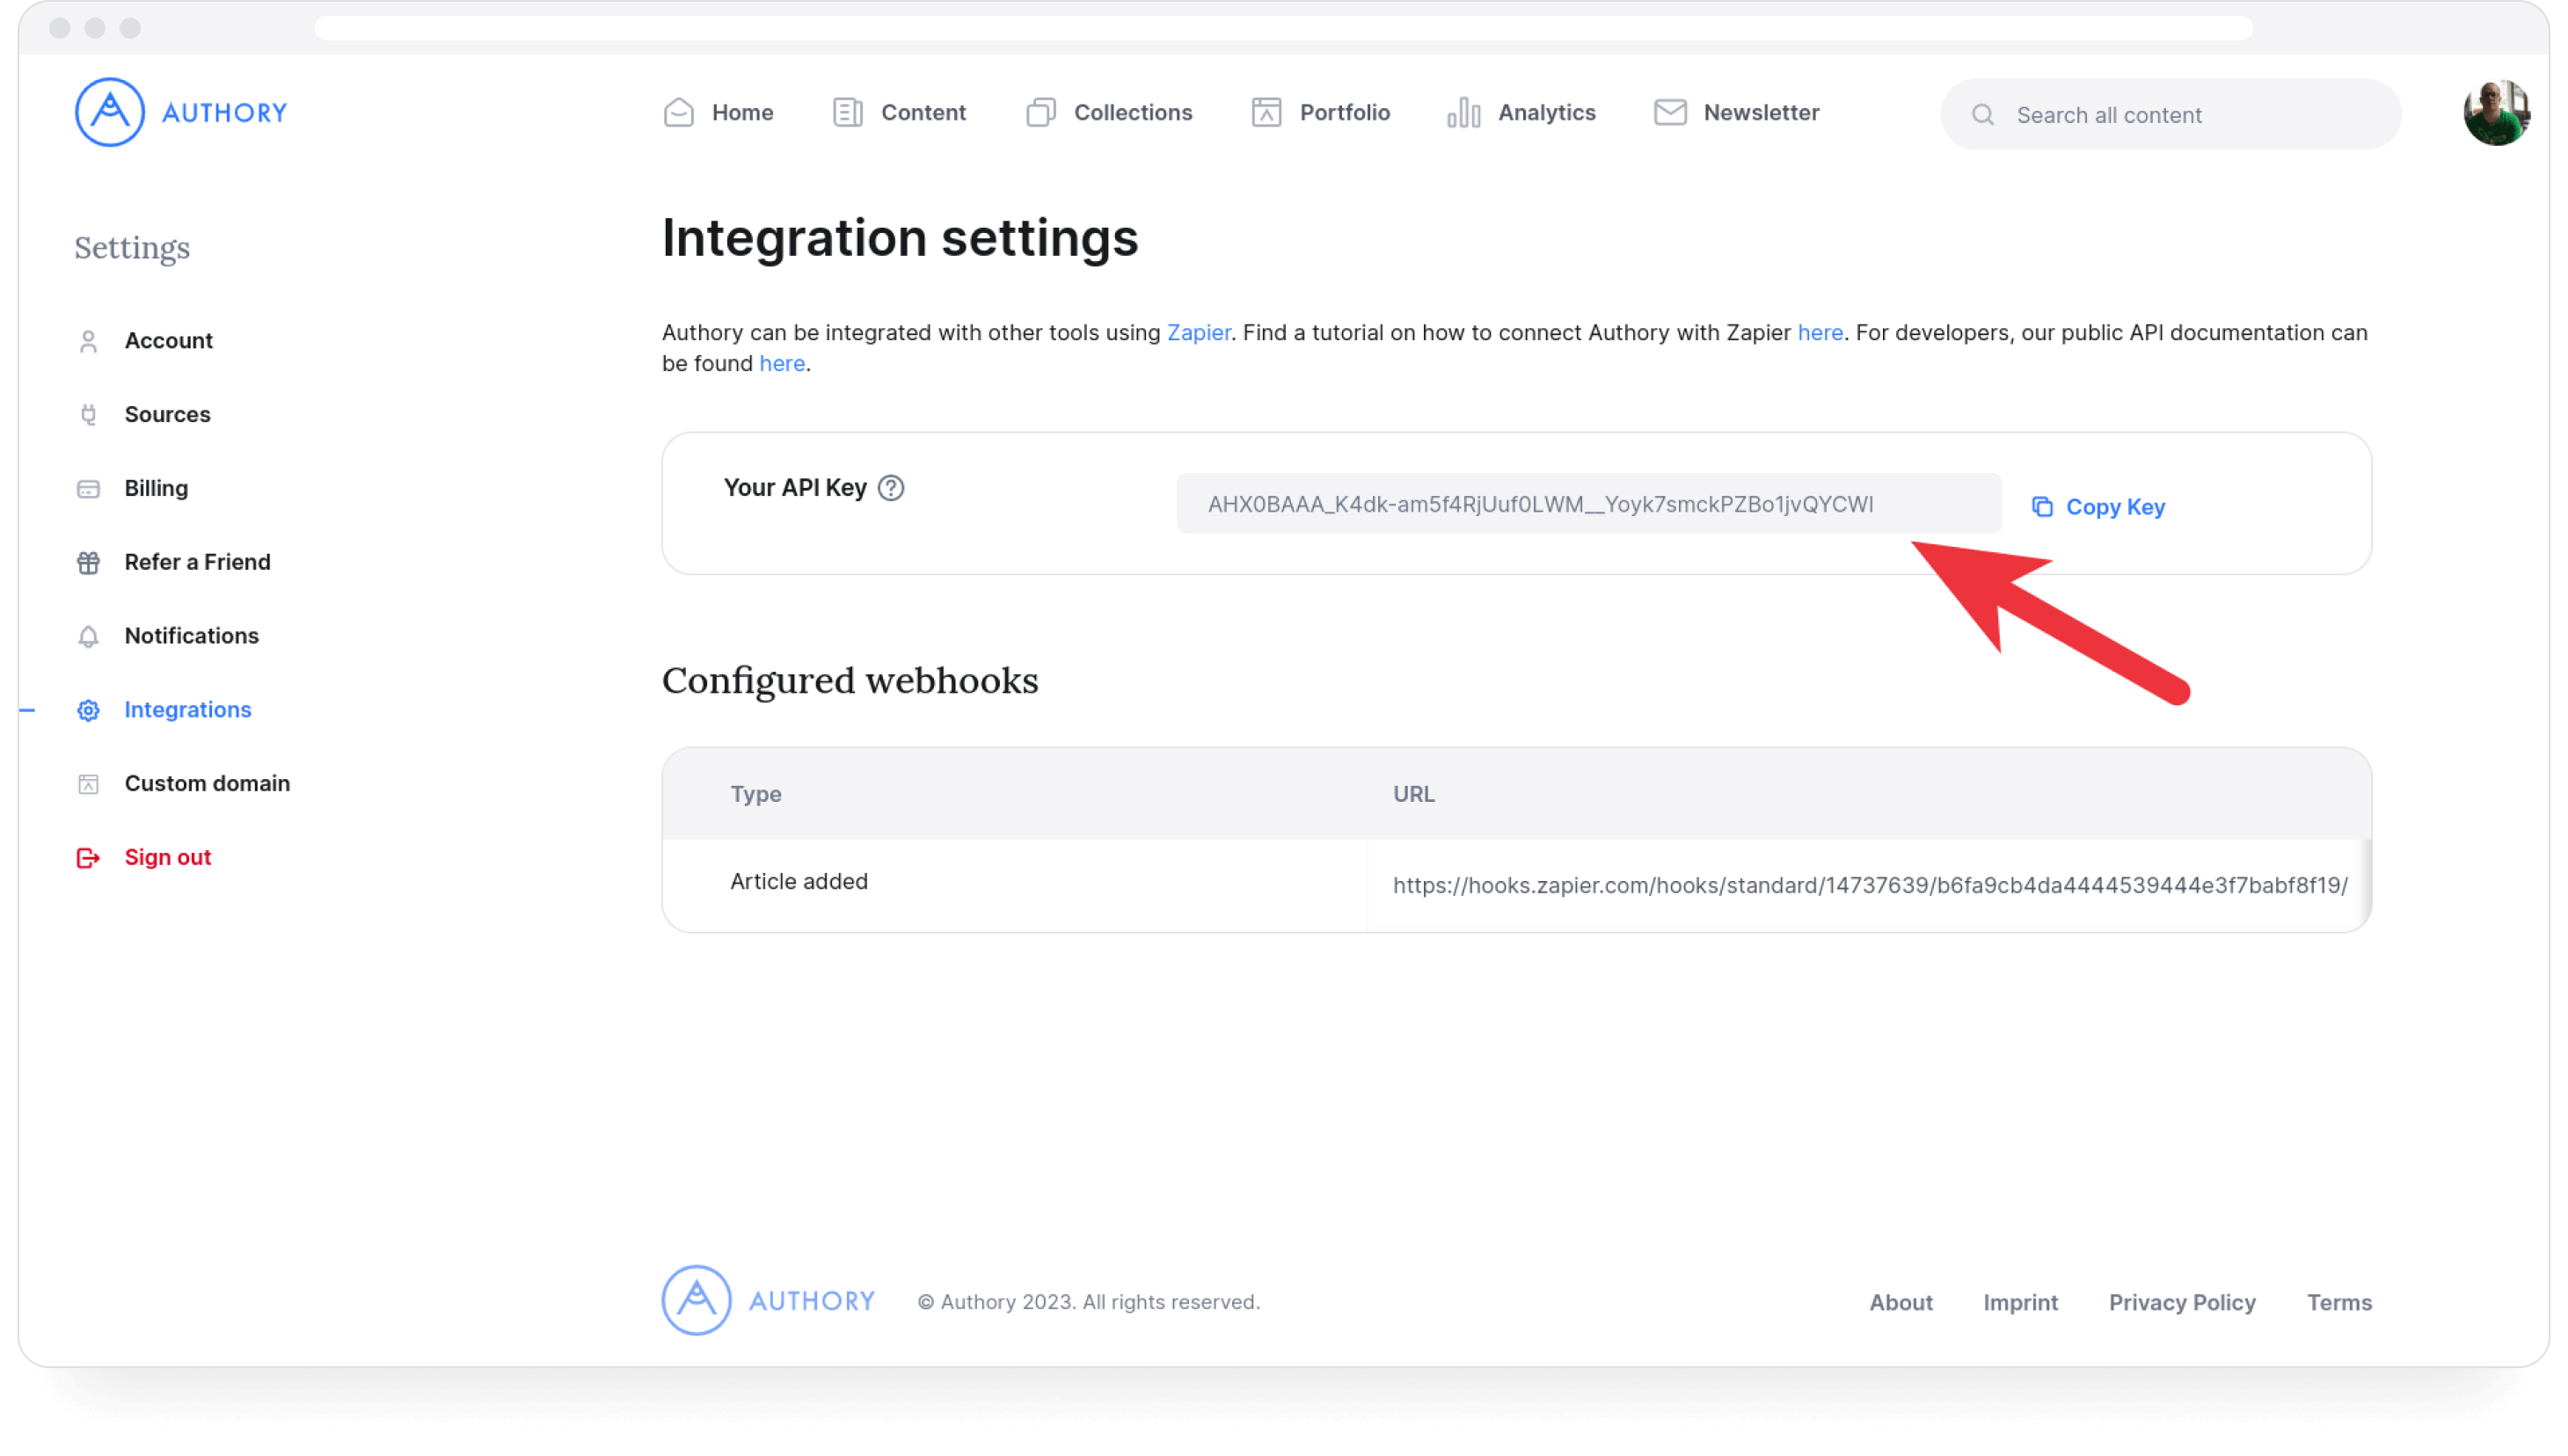
Click "Continue" and select your Authory account to connect with Zapier. If you have not connected your account yet, you can do so by clicking Connect new Account and submitting your Authory API token to Zapier.
You can find your API token in your settings pages on the Integrations page.
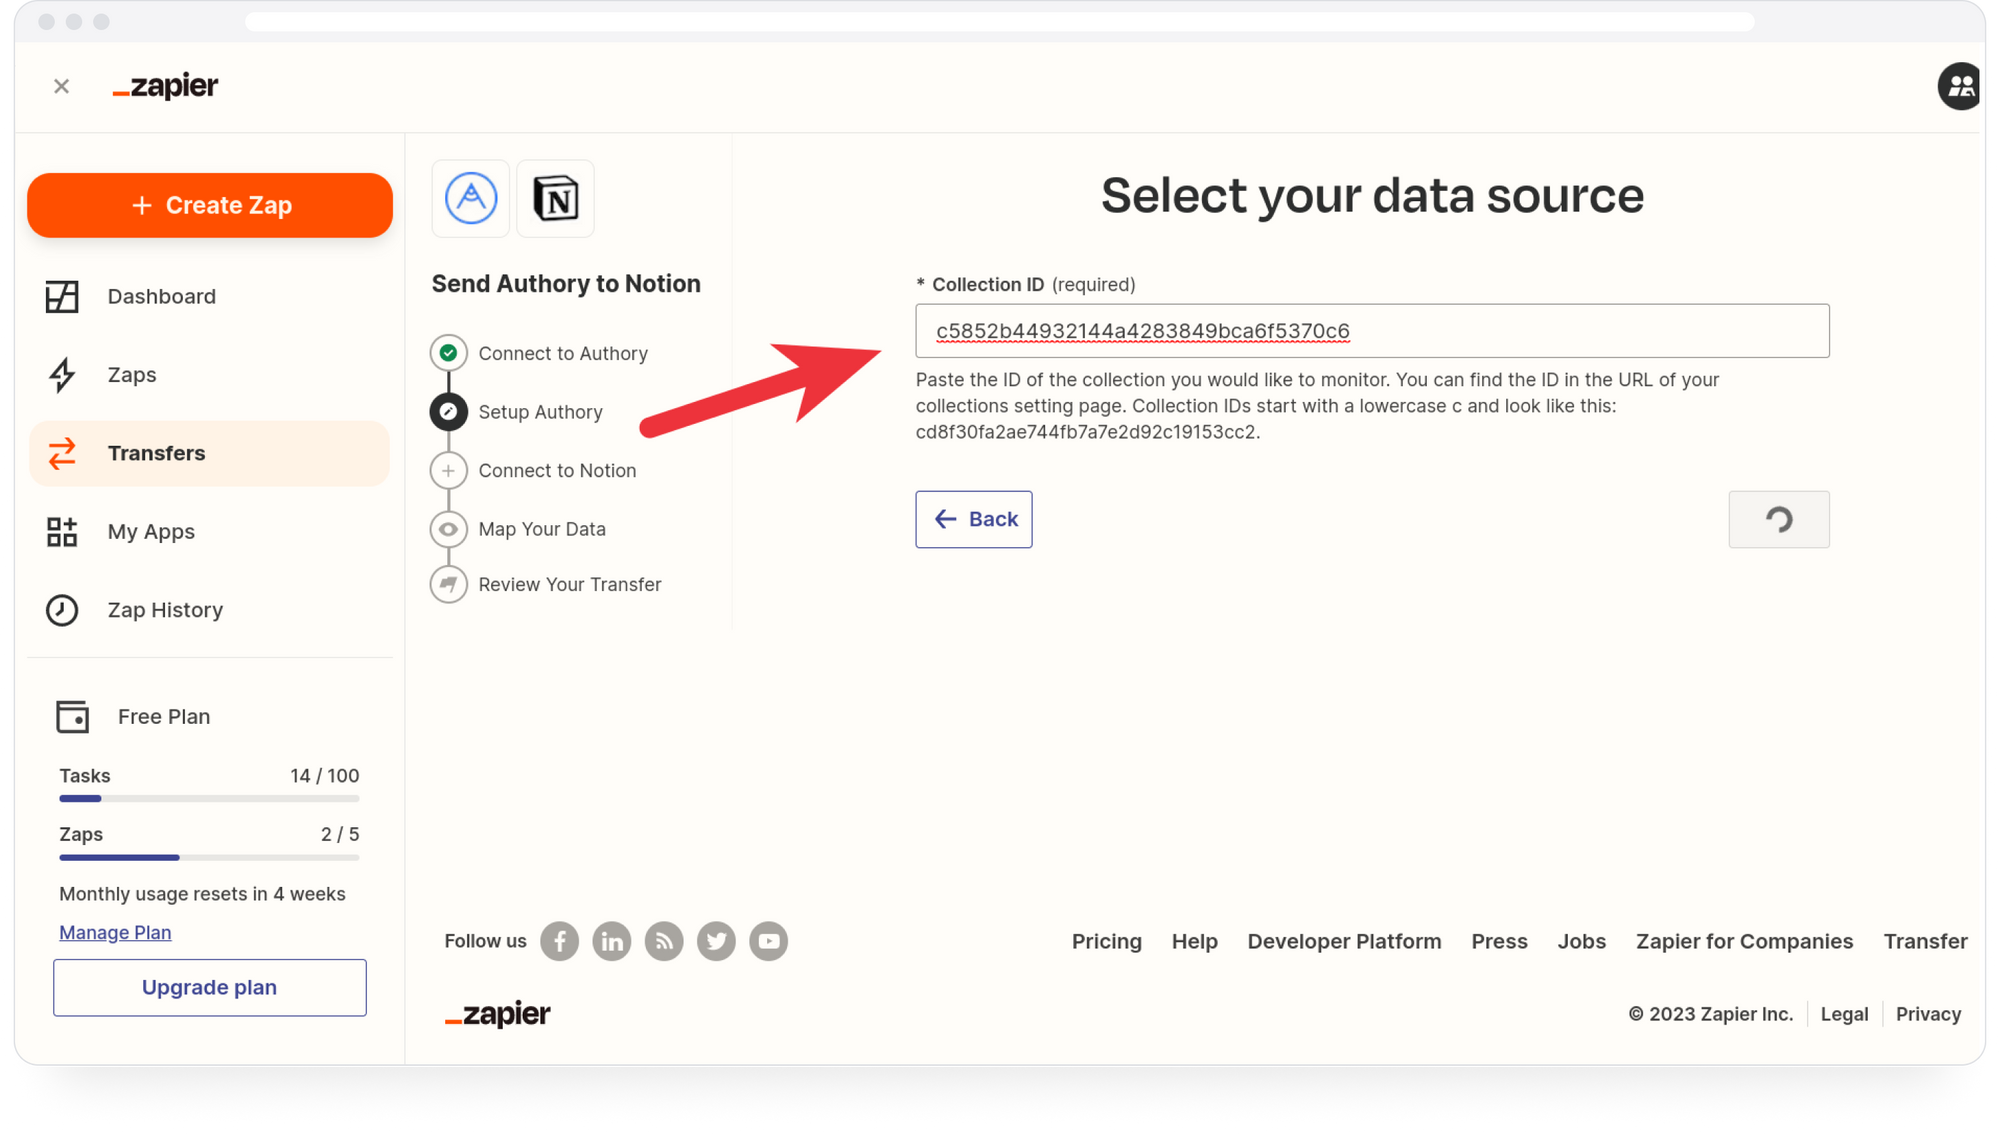
On the next page add the ID of the collection you'd like to connect the integration to.
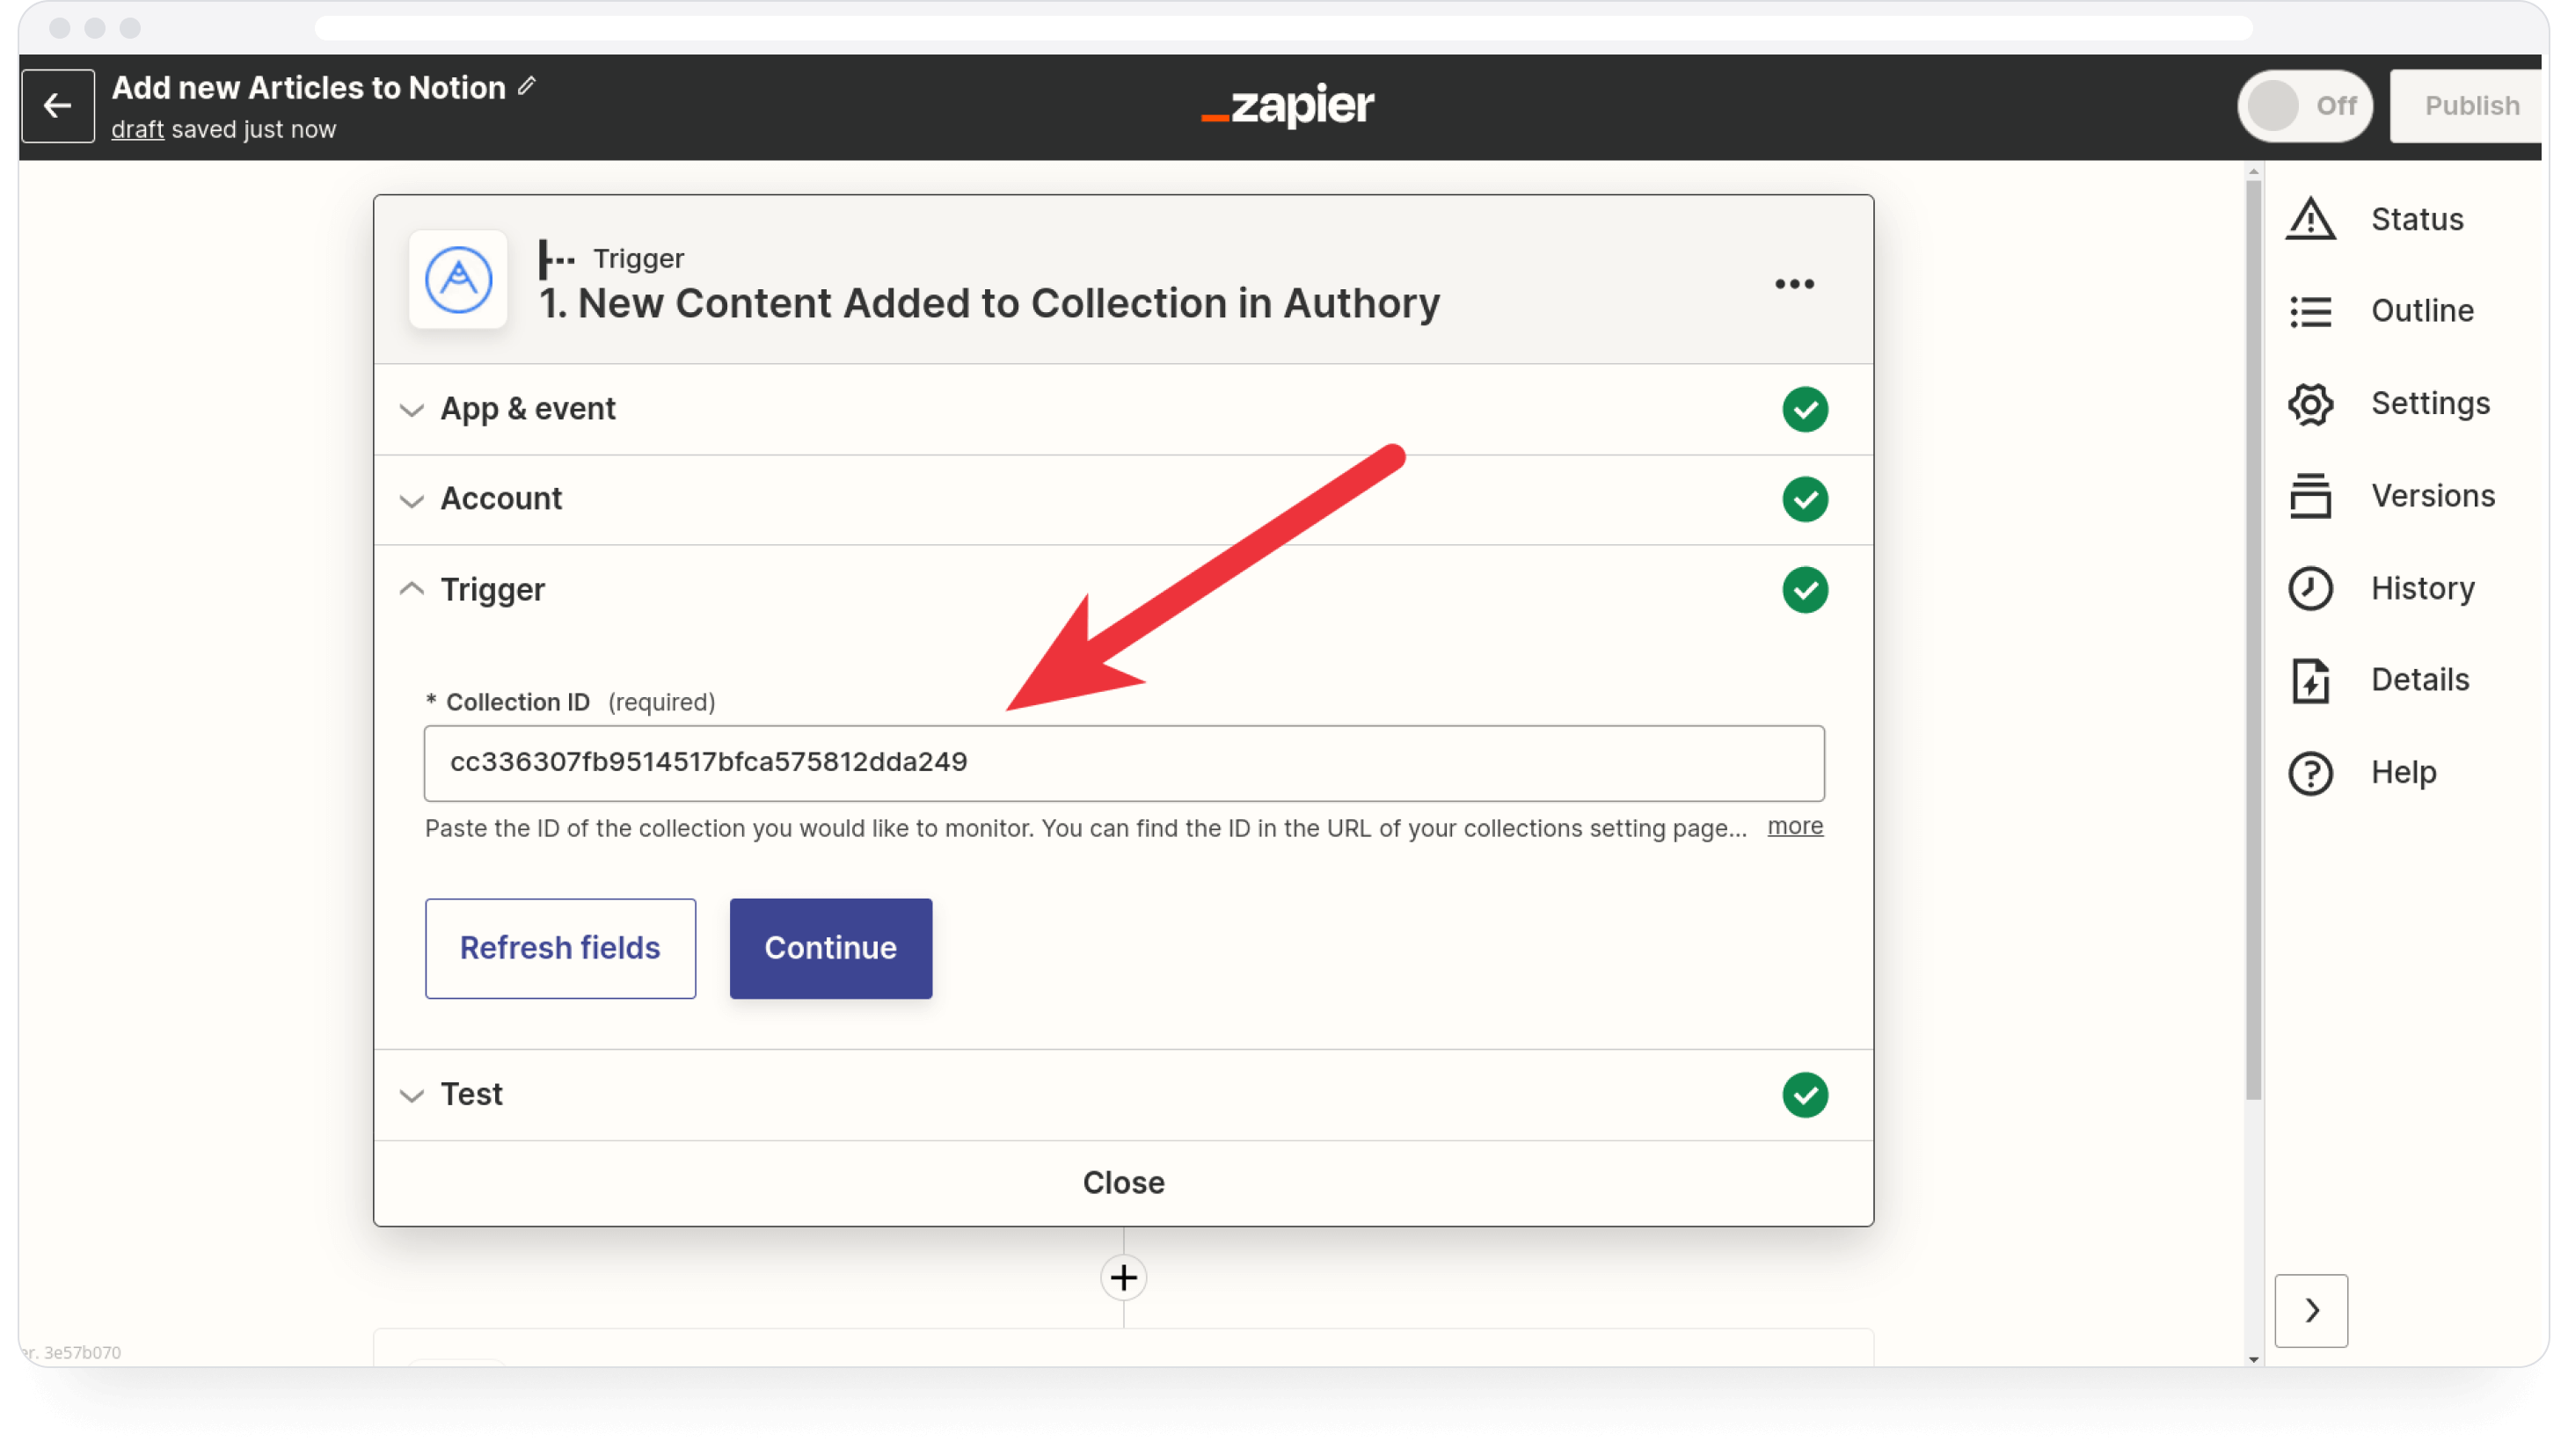
You can find the collection ID at the end of the URL shown in the browser when viewing the collection settings. A collection ID always starts with a c and looks similar to this: cba127f803b4d4419821c350dcbb4d222.
Click Continue and hit Test on the next page.
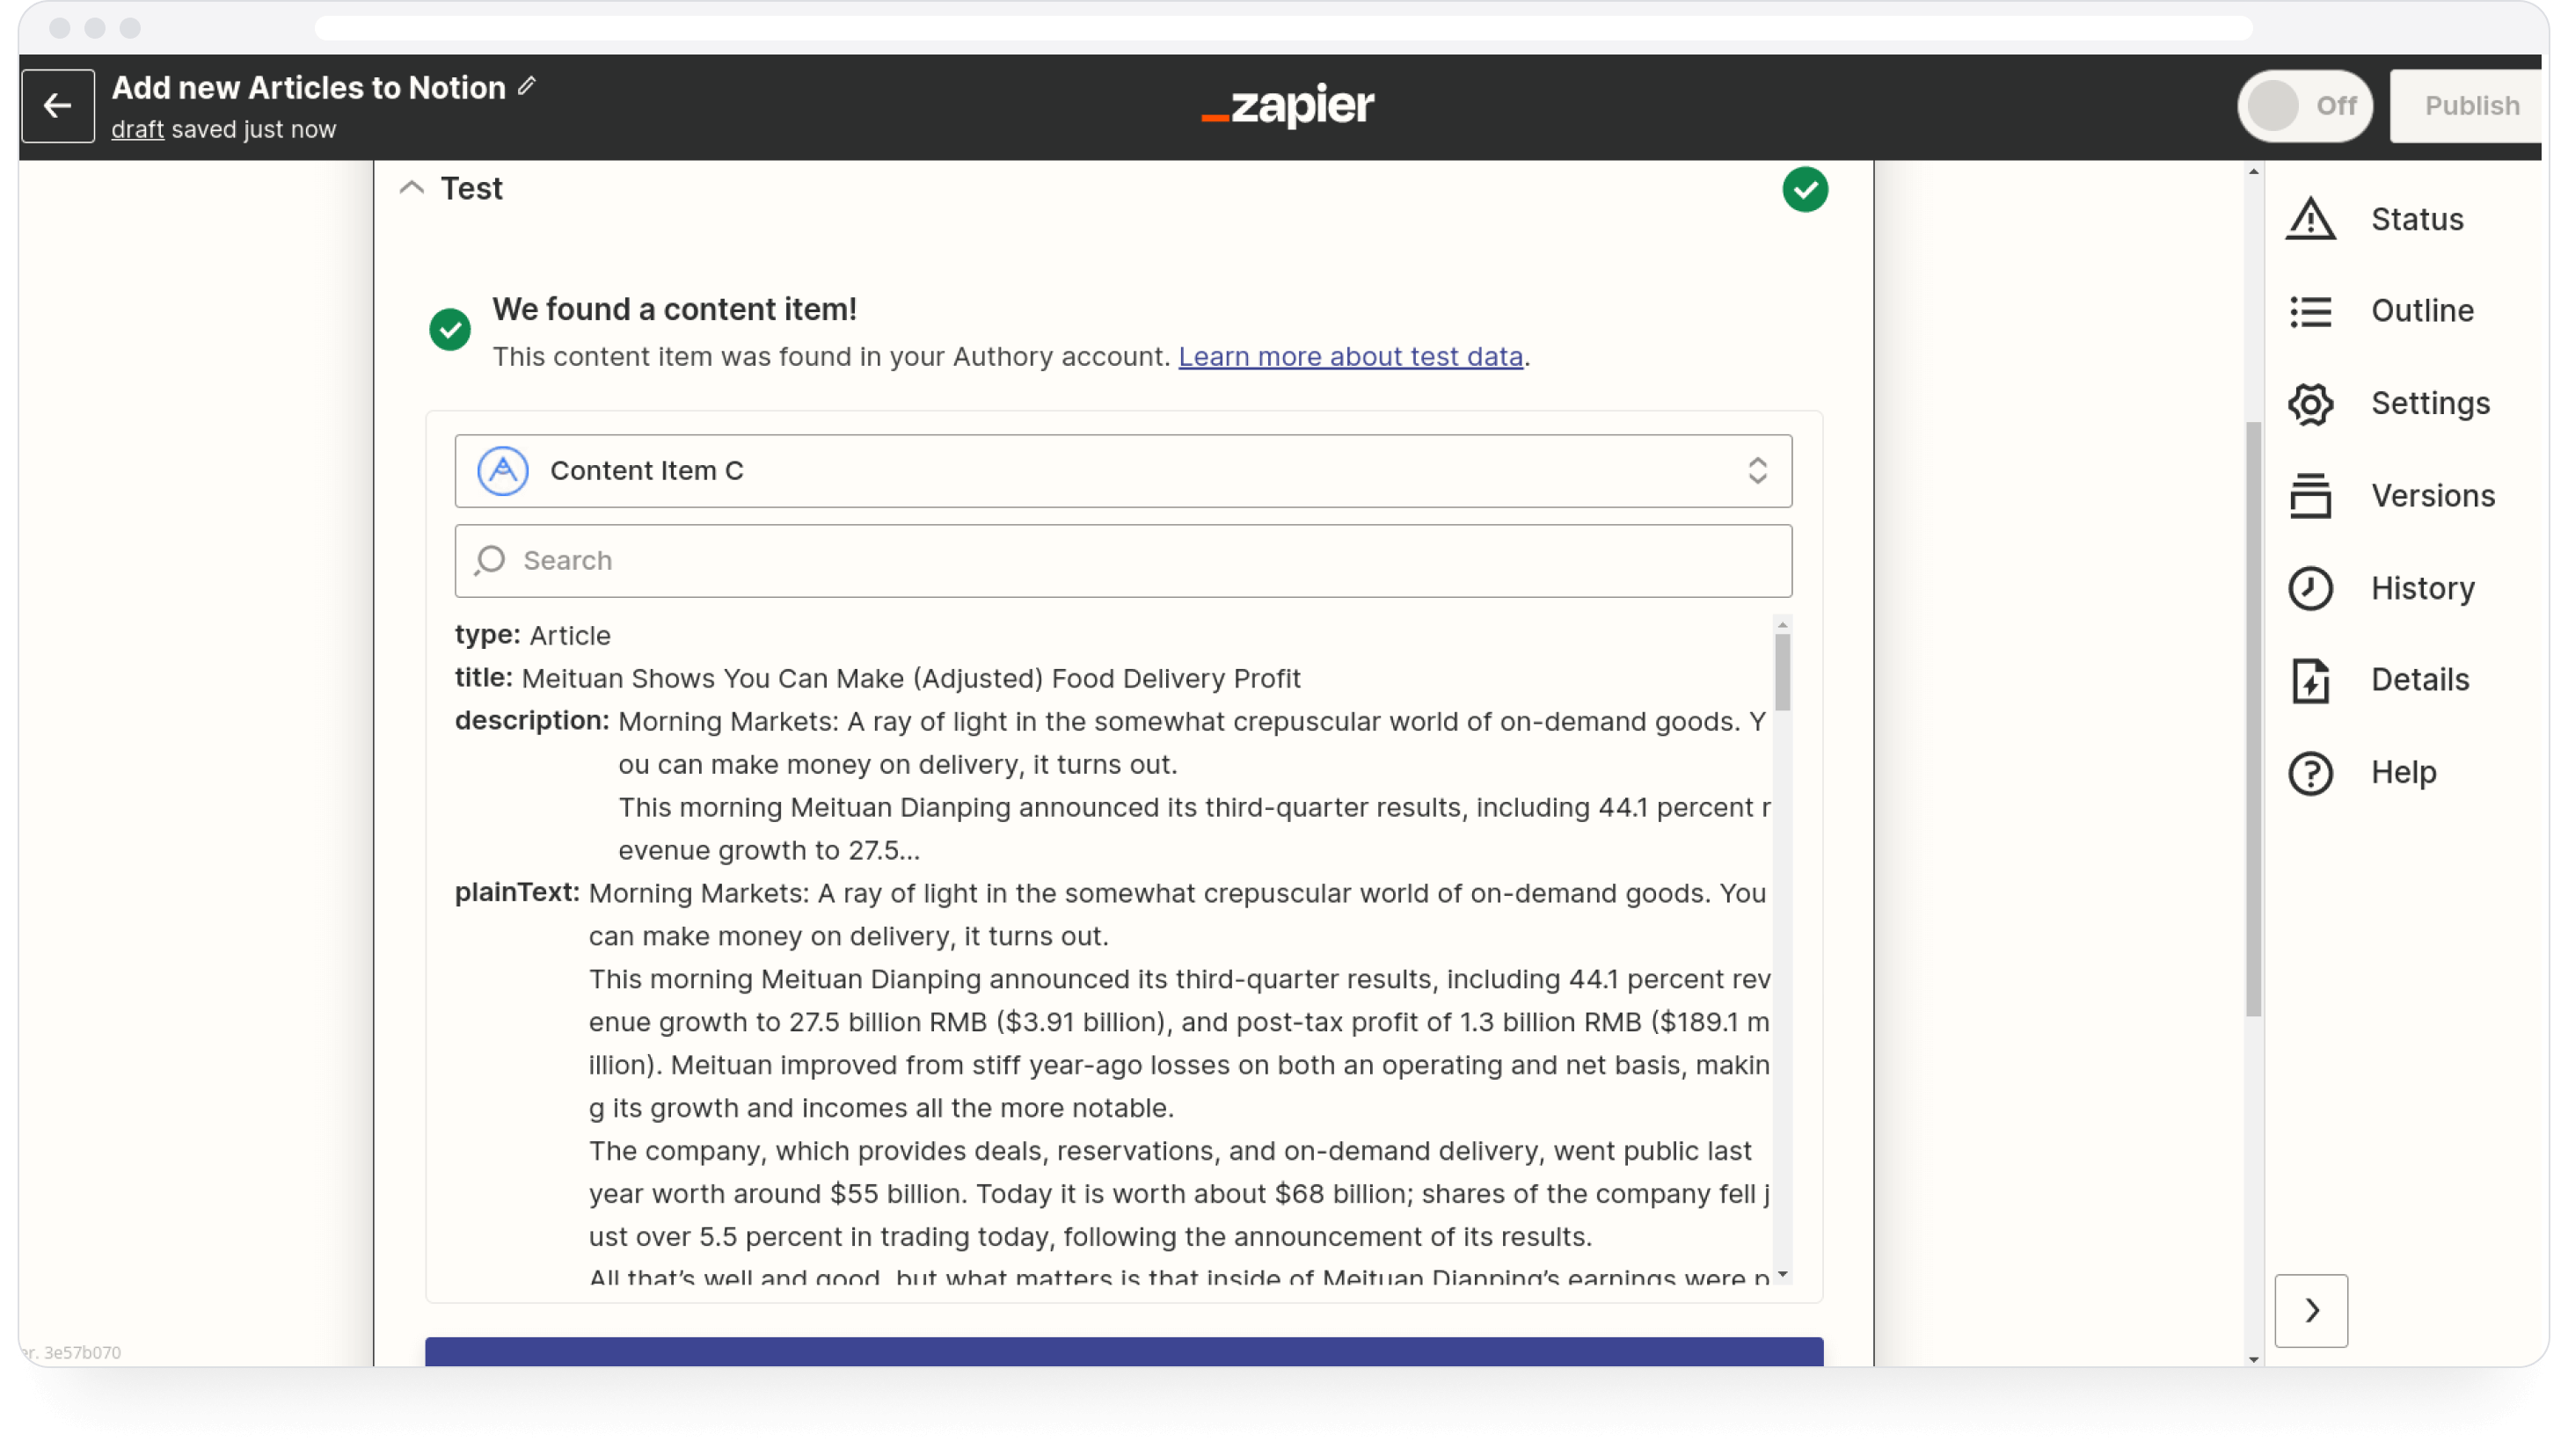
You should see one of your latest articles as a result.
Configuring the Notion action in Zapier
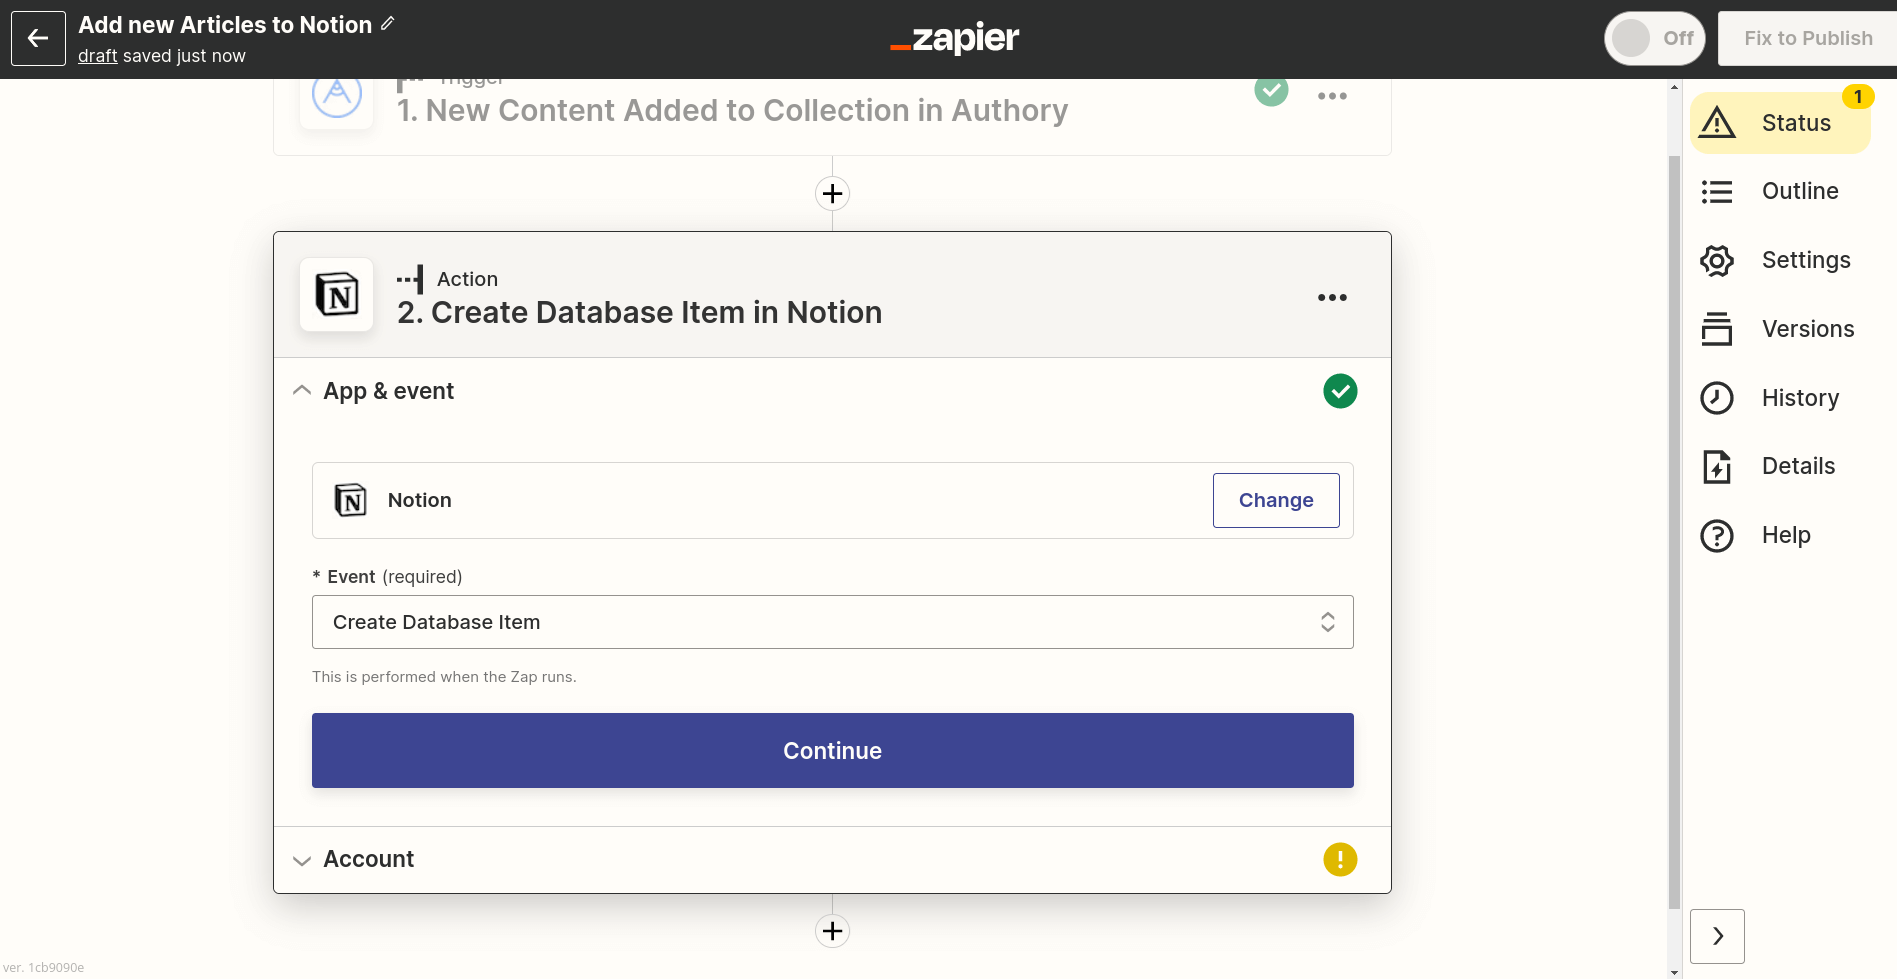
Now it's time to connection Notion. Add a new Action to your Zap and select Notion. As an event, select Create Database Item.
Click "Continue" and connect your notion Account. Make sure to grant access to the database we created earlier. You can also find more information about connecting Notion to Zapier here.
As soon as your account is connected, select the database we created earlier.
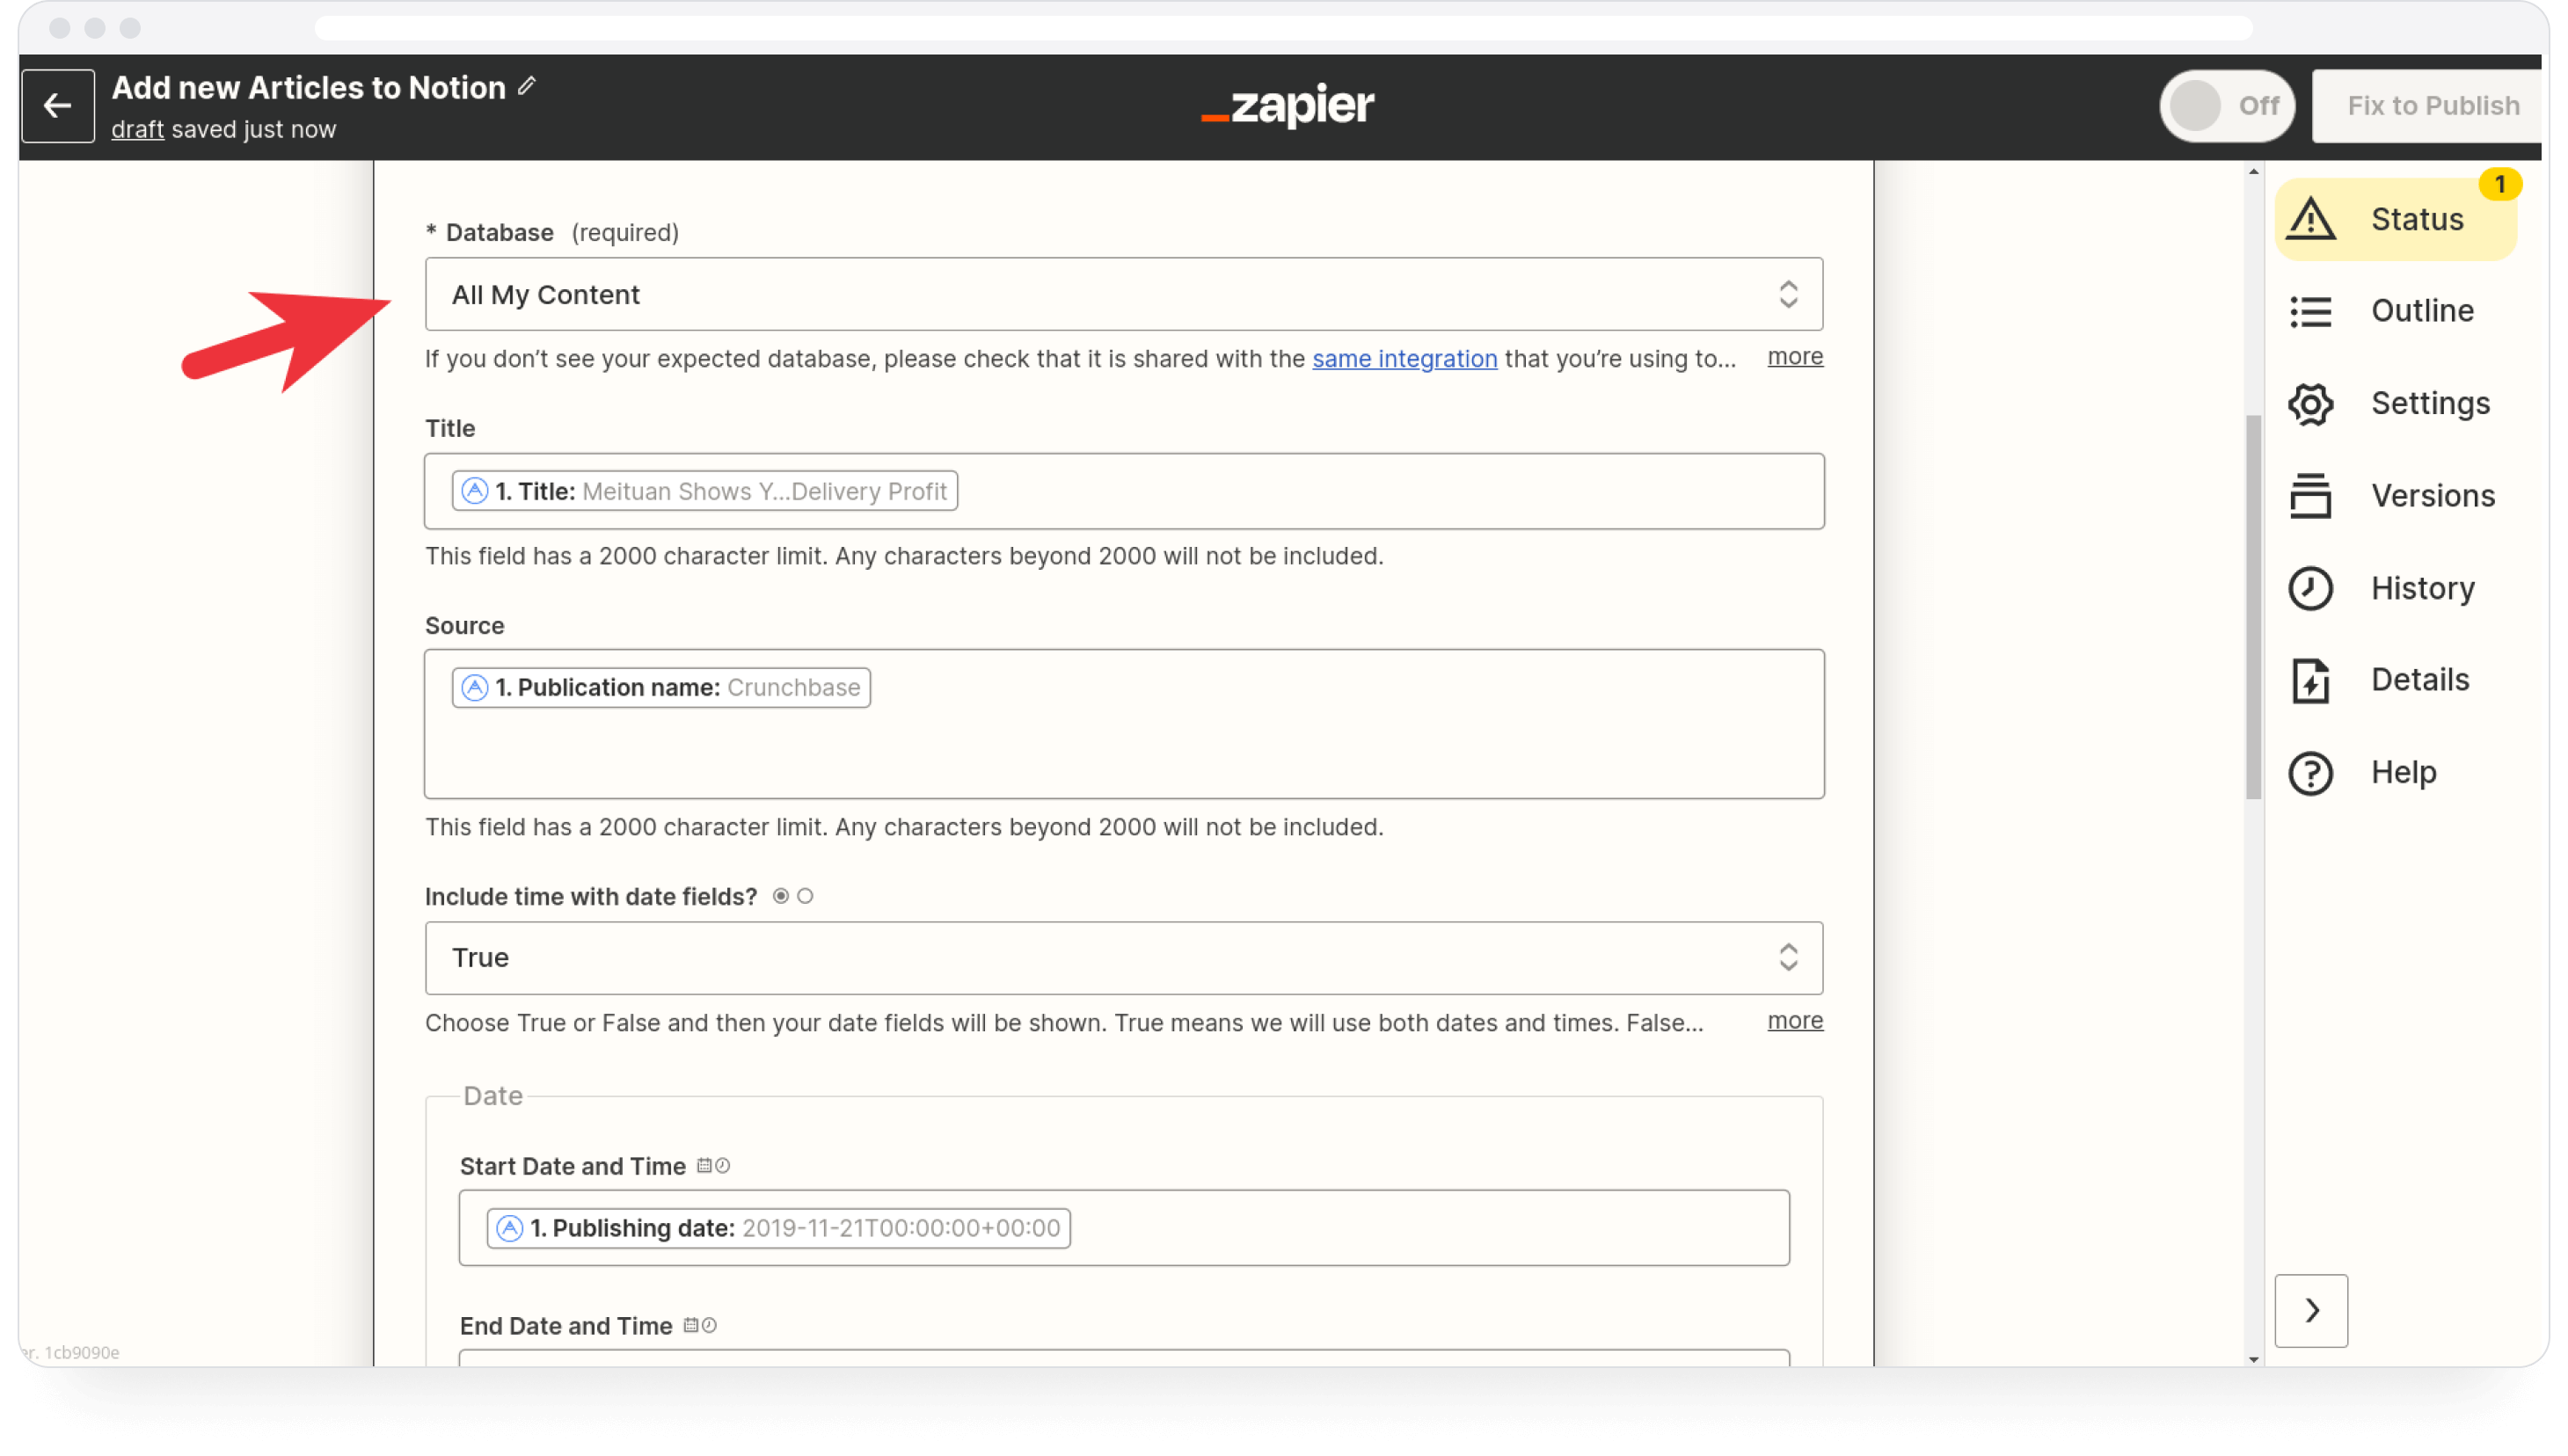
Then, configure all the fields:
- For Title, choose Title
- For Source, choose Publication Name
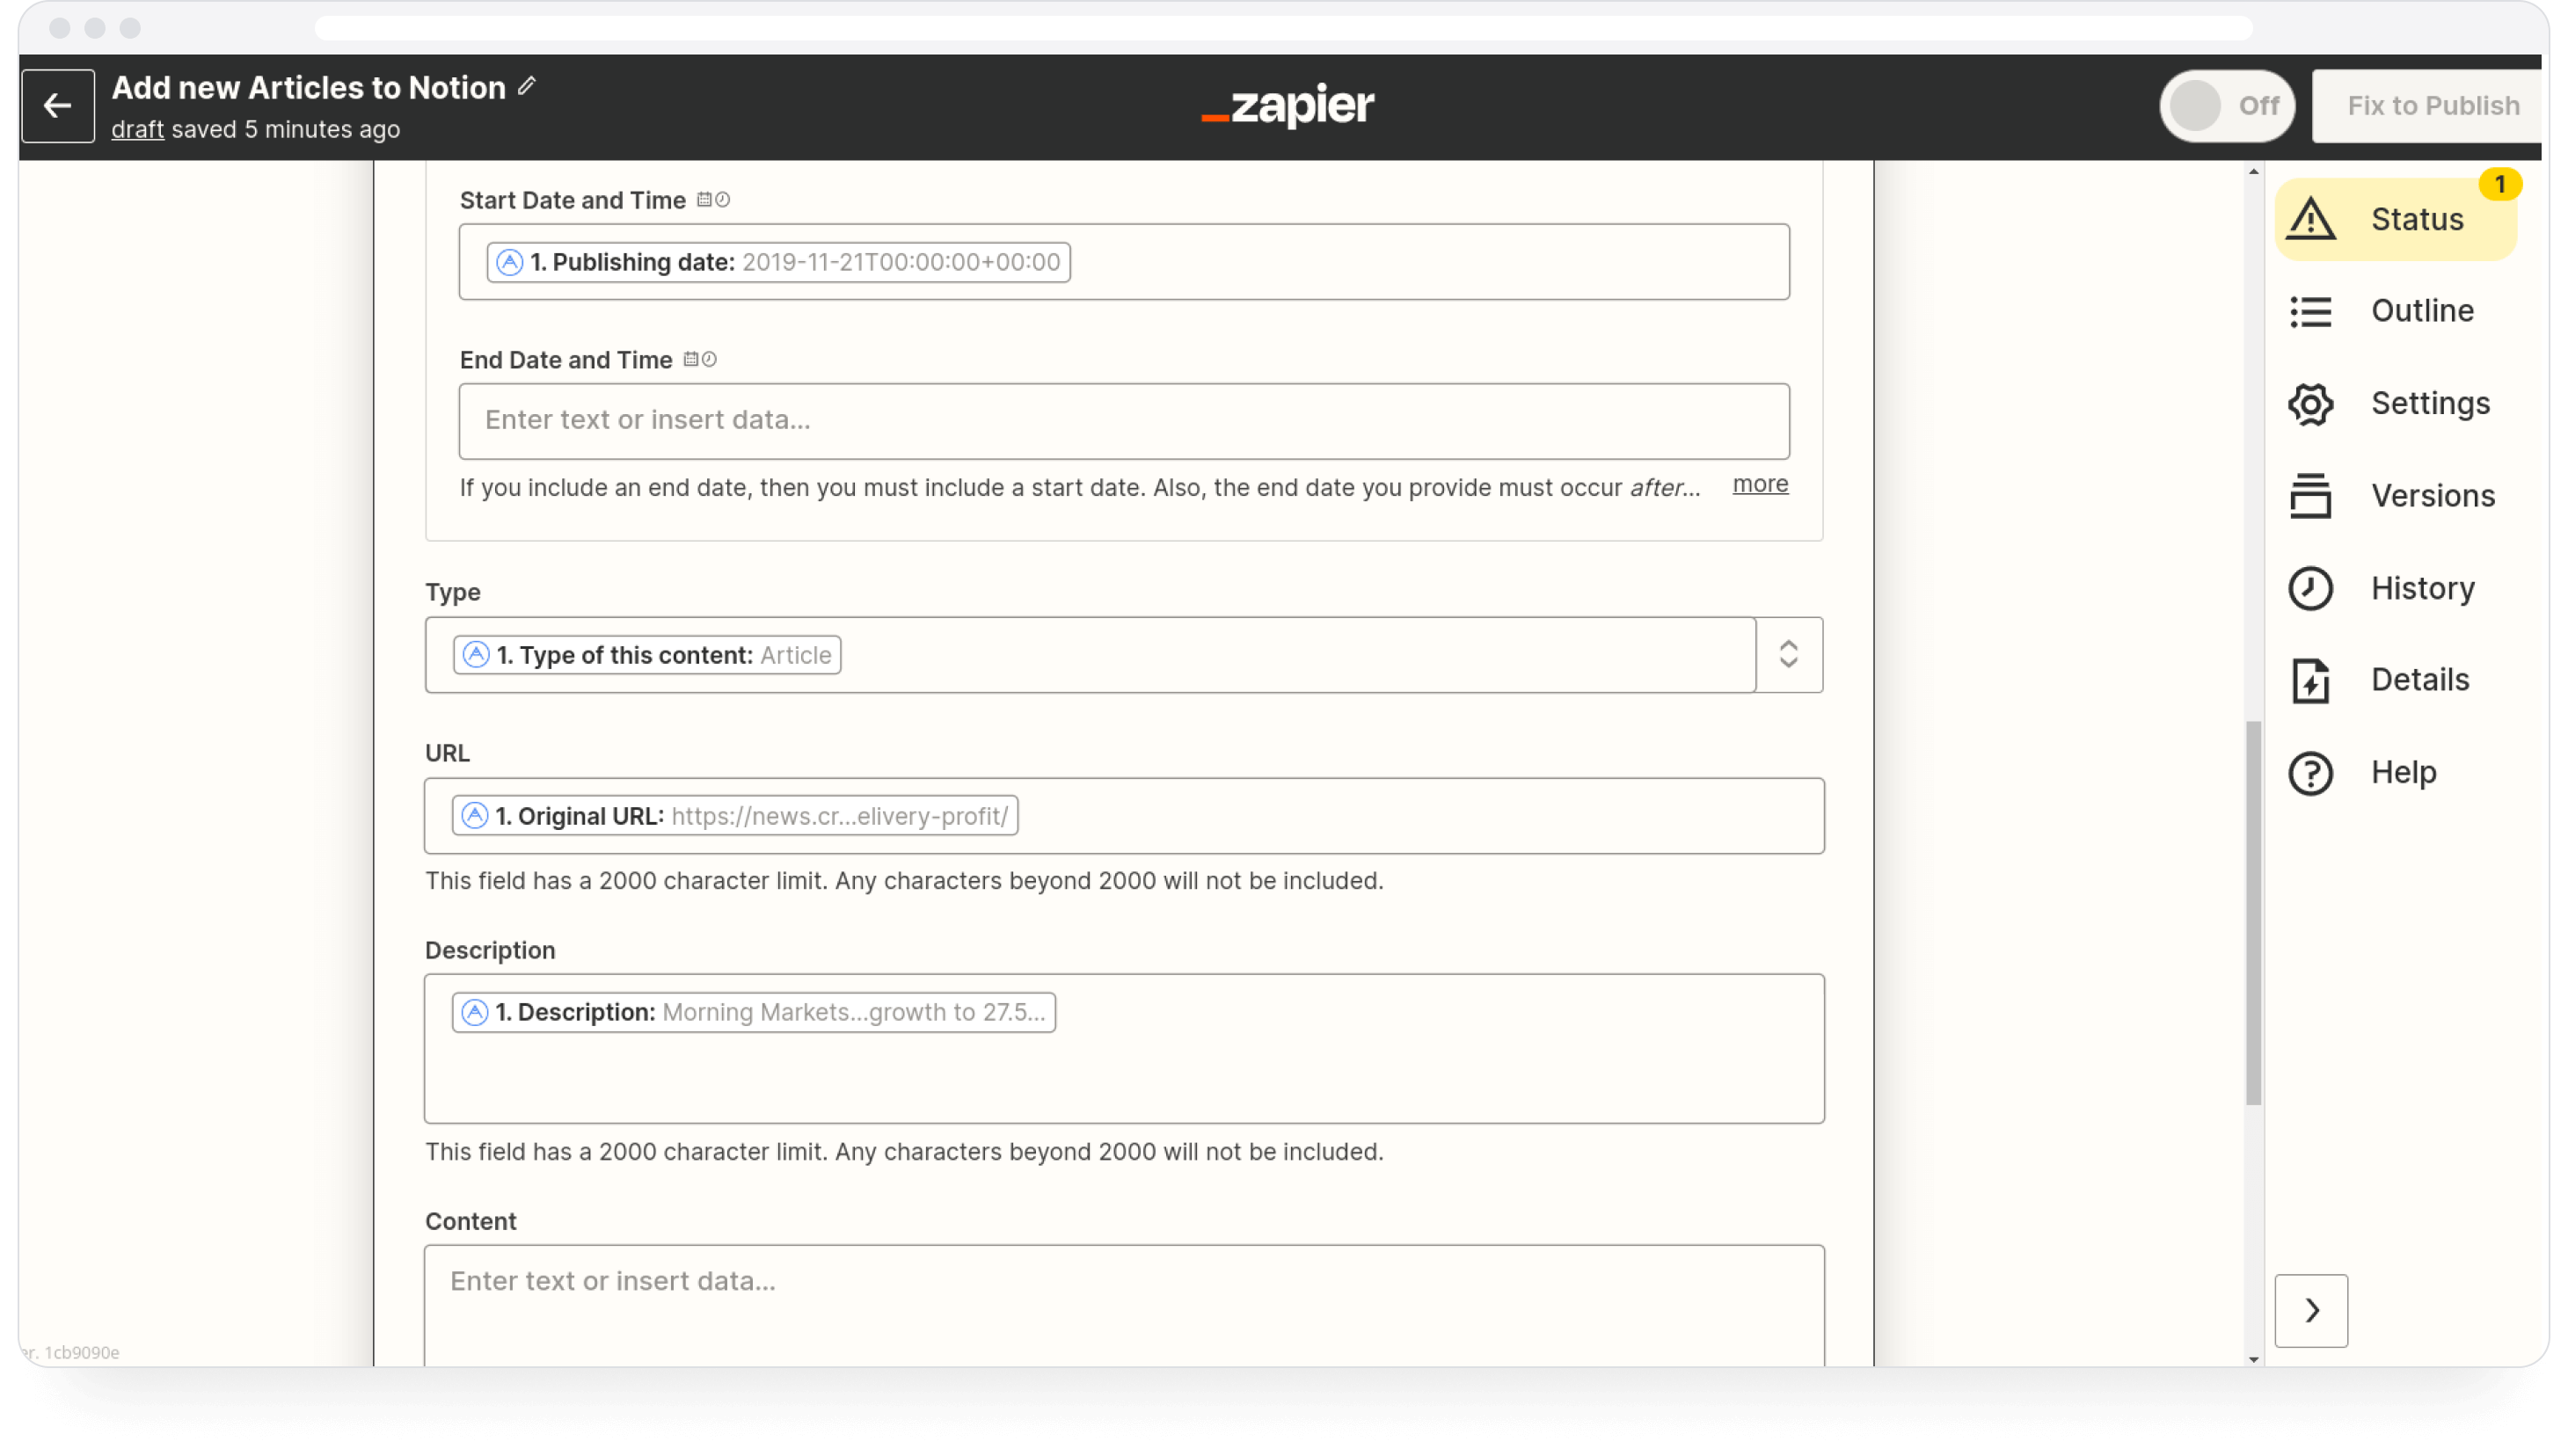
- For Date, first select true in the Include time with date fields dropdown. Then, for Start Date and Time choose Publishing date. Leave End Date and Time empty.
- For Type, select Type of this content
- For URL, select Original URL
- For Description, select Description
- Leave Content and Content Format empty
Once all fields are set up, click continue. On the n ext screen, you'll see a summary. You can click Test action to test the action with the data we received when setting up our trigger. This will create an entry in your Notion database.
From now on, every time Authory discovers a new content piece of yours and adds it to the collection configured before, Zapier will create a new entry in the database.
Click Publish Zap to finish.
Exporting your entire Archive with Zapier Transfers
The Zap configured above will only copy content that is newly added to your collection.
If you'd like to export all existing content in your collection, or even all content in your Authory account, then you can use the Zapier Transfers feature, which is supported by Authory.
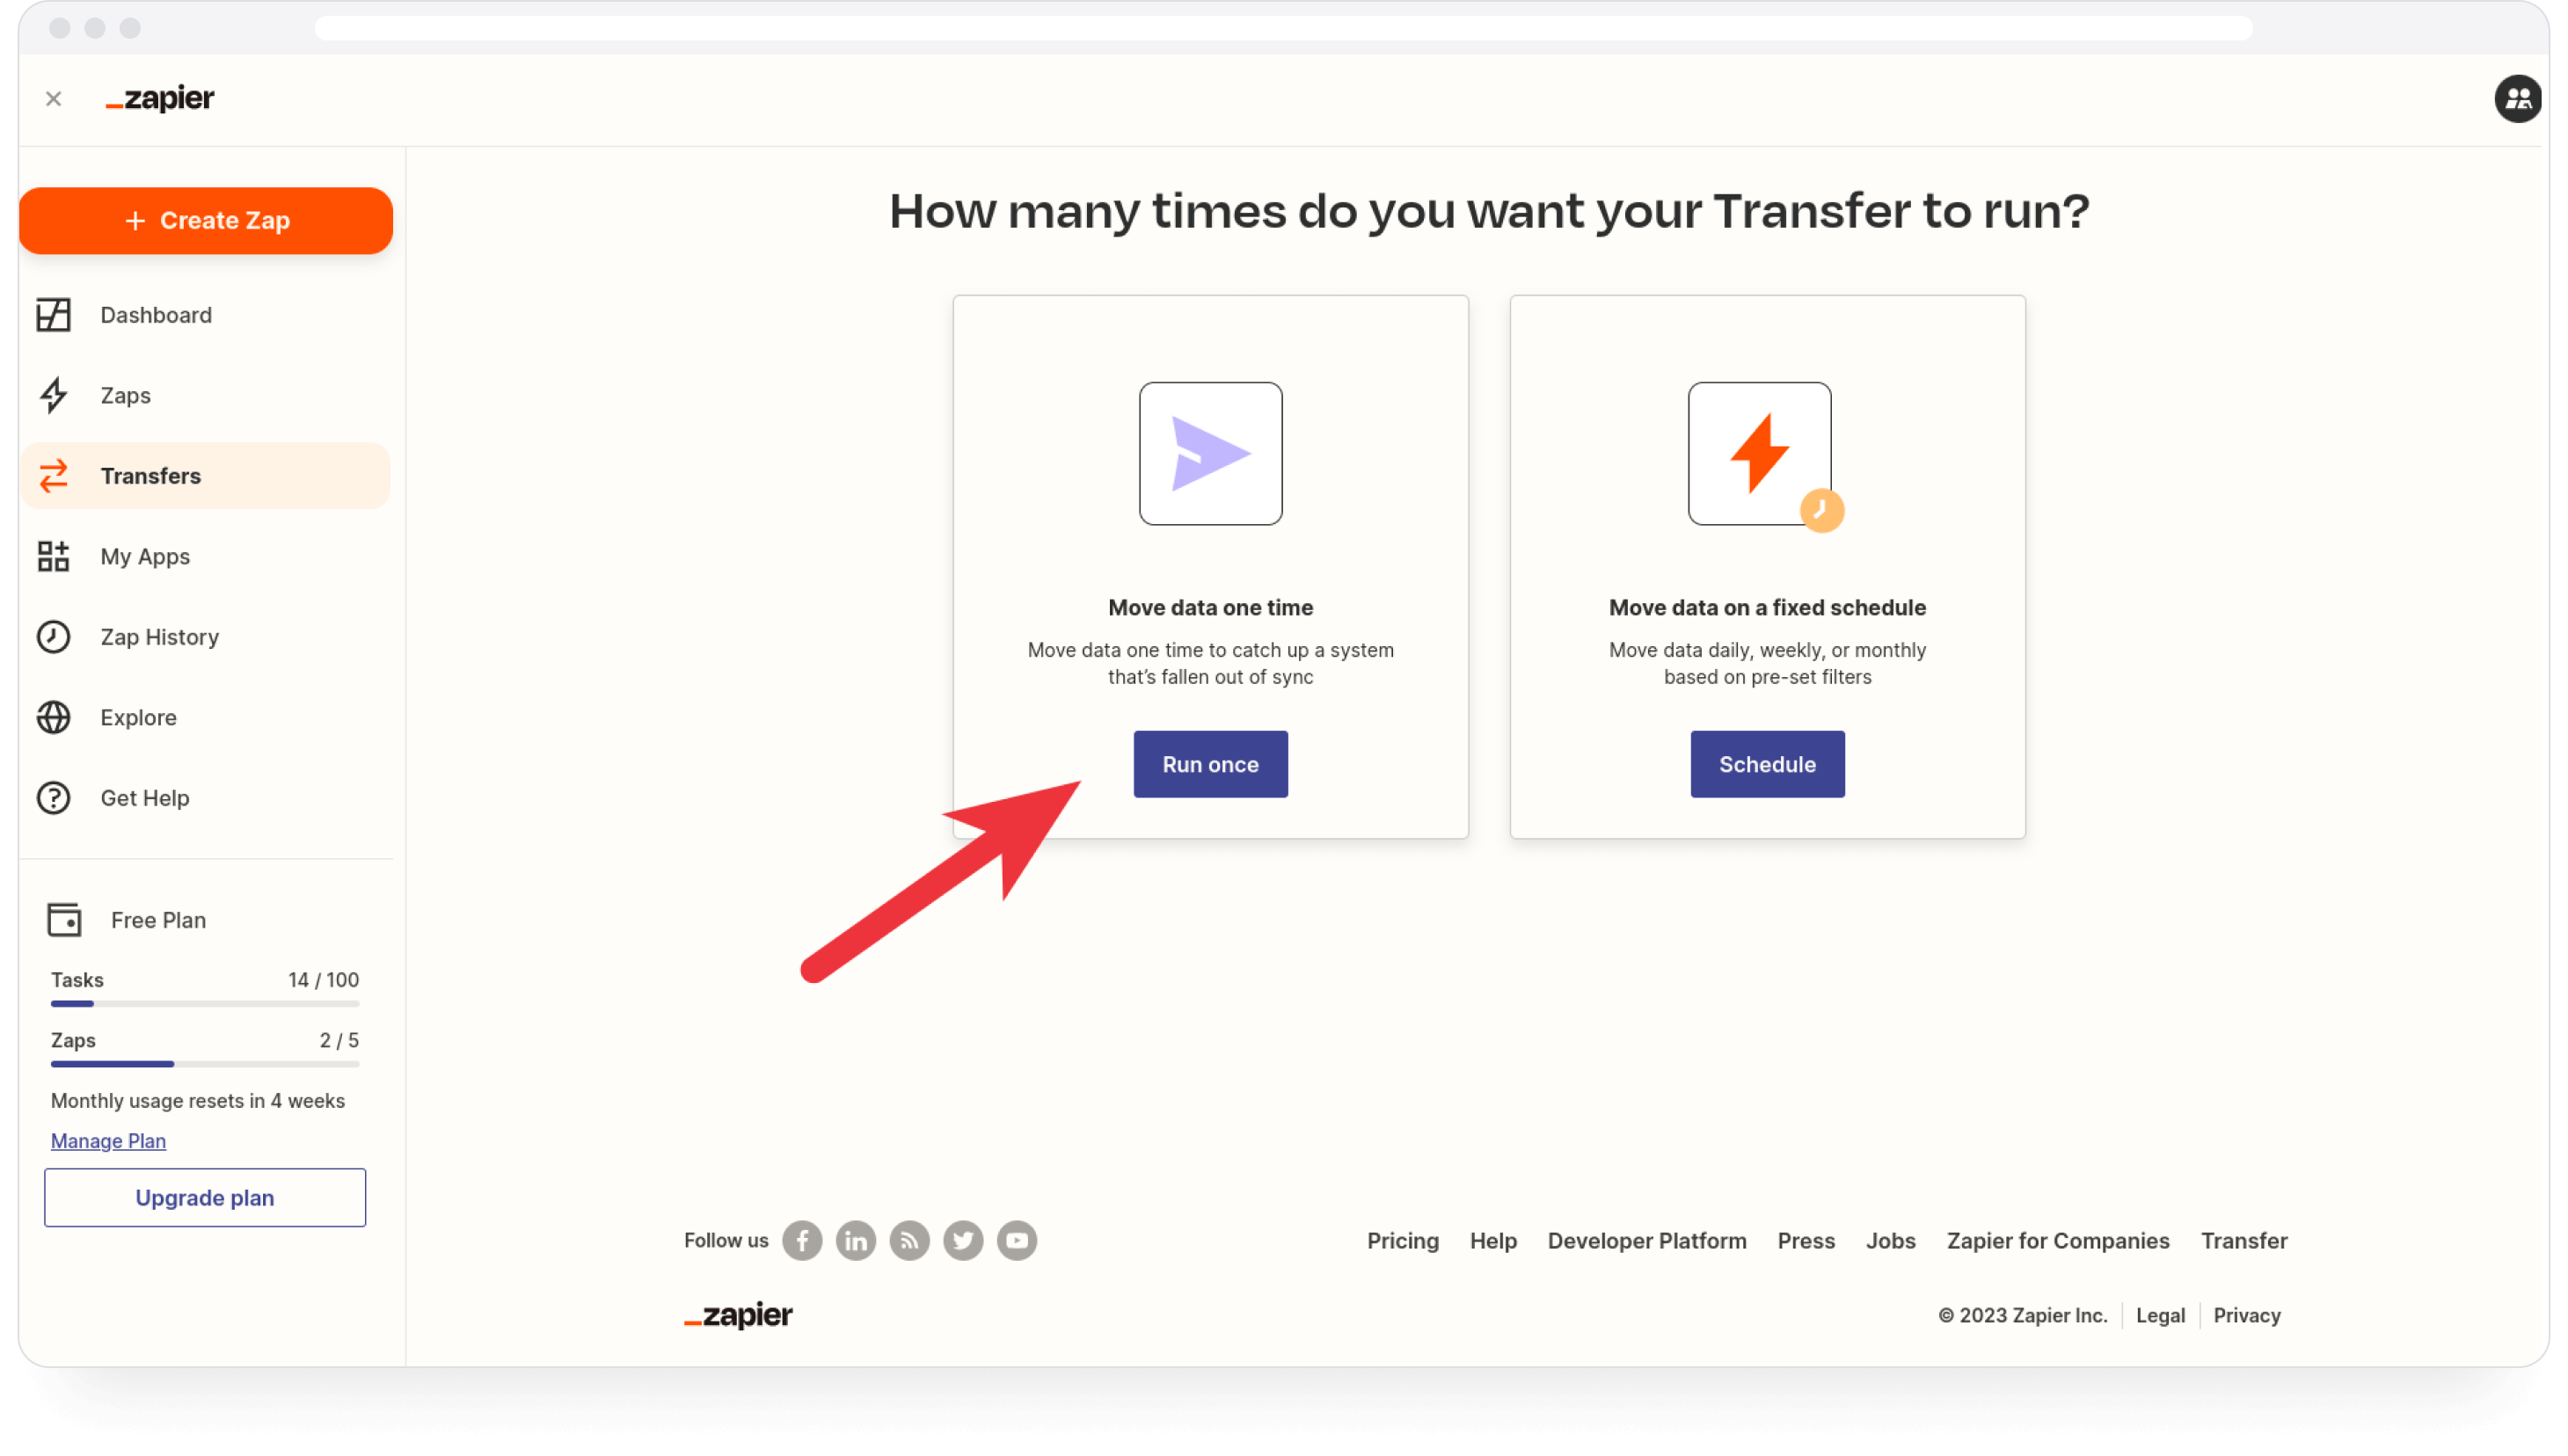
To get started, log into Zapier and select Transfers in the sidebar. Then click New Transfer.
On the next screen, select Run once, since we configured a Zap above, which takes care of updating. The Zap has the advantage that it will react way faster to new content.
Then, click Create a new transfer on the next screen.
Select Authory as Source. As Source data select the second entry named Content Item.
As Destination, select Notion. As Destination action, select Create Database Item.
Then, click Next. On the next screen, select your Authory account and click Next again. Enter the ID of the collection you'd like to import into notion.
Click Next. In the next step, select the Notion account to use and click Next.
Then, select the database you want to import and configure all fields to map accordingly. The configuration works exactly the same way as described above for creating the Zap.
Click Next and check out the previews. If everything looks like you expect, click Looks good.
Zapier will now fetch all your data, which might take a moment. Zapier will show you all fetched content items upon completion.
Select the items you'd like to transfer using the checkboxes. You can also select all items using the checkbox next to Title.
When you're ready with your selection, click Next.
On the next page, confirm your transfer by clicking Send data.
Zapier will import all selected content items from Authory into your Notion database.
Summing up
Authory provides a Zapier integration which allows you to do many things with your content. In this tutorial, we explained how to add any new content to a Notion database. We also showed how to transfer your entire Authory archive into Notion.
Theres countless other things that can be built. You could for example also integrate Airtable, or send a Slack message whenever a new article is published.
Over the next months, we will continuously improve our integrations. If you have any cool ideas, or you'd like to see a specific integration, let us know!